DIY Screen Printing
Lately I’ve had a fascination with screen printing and once I get an idea in my mind, I just have to do it. After watching several videos, I decided to give screen printing a try.
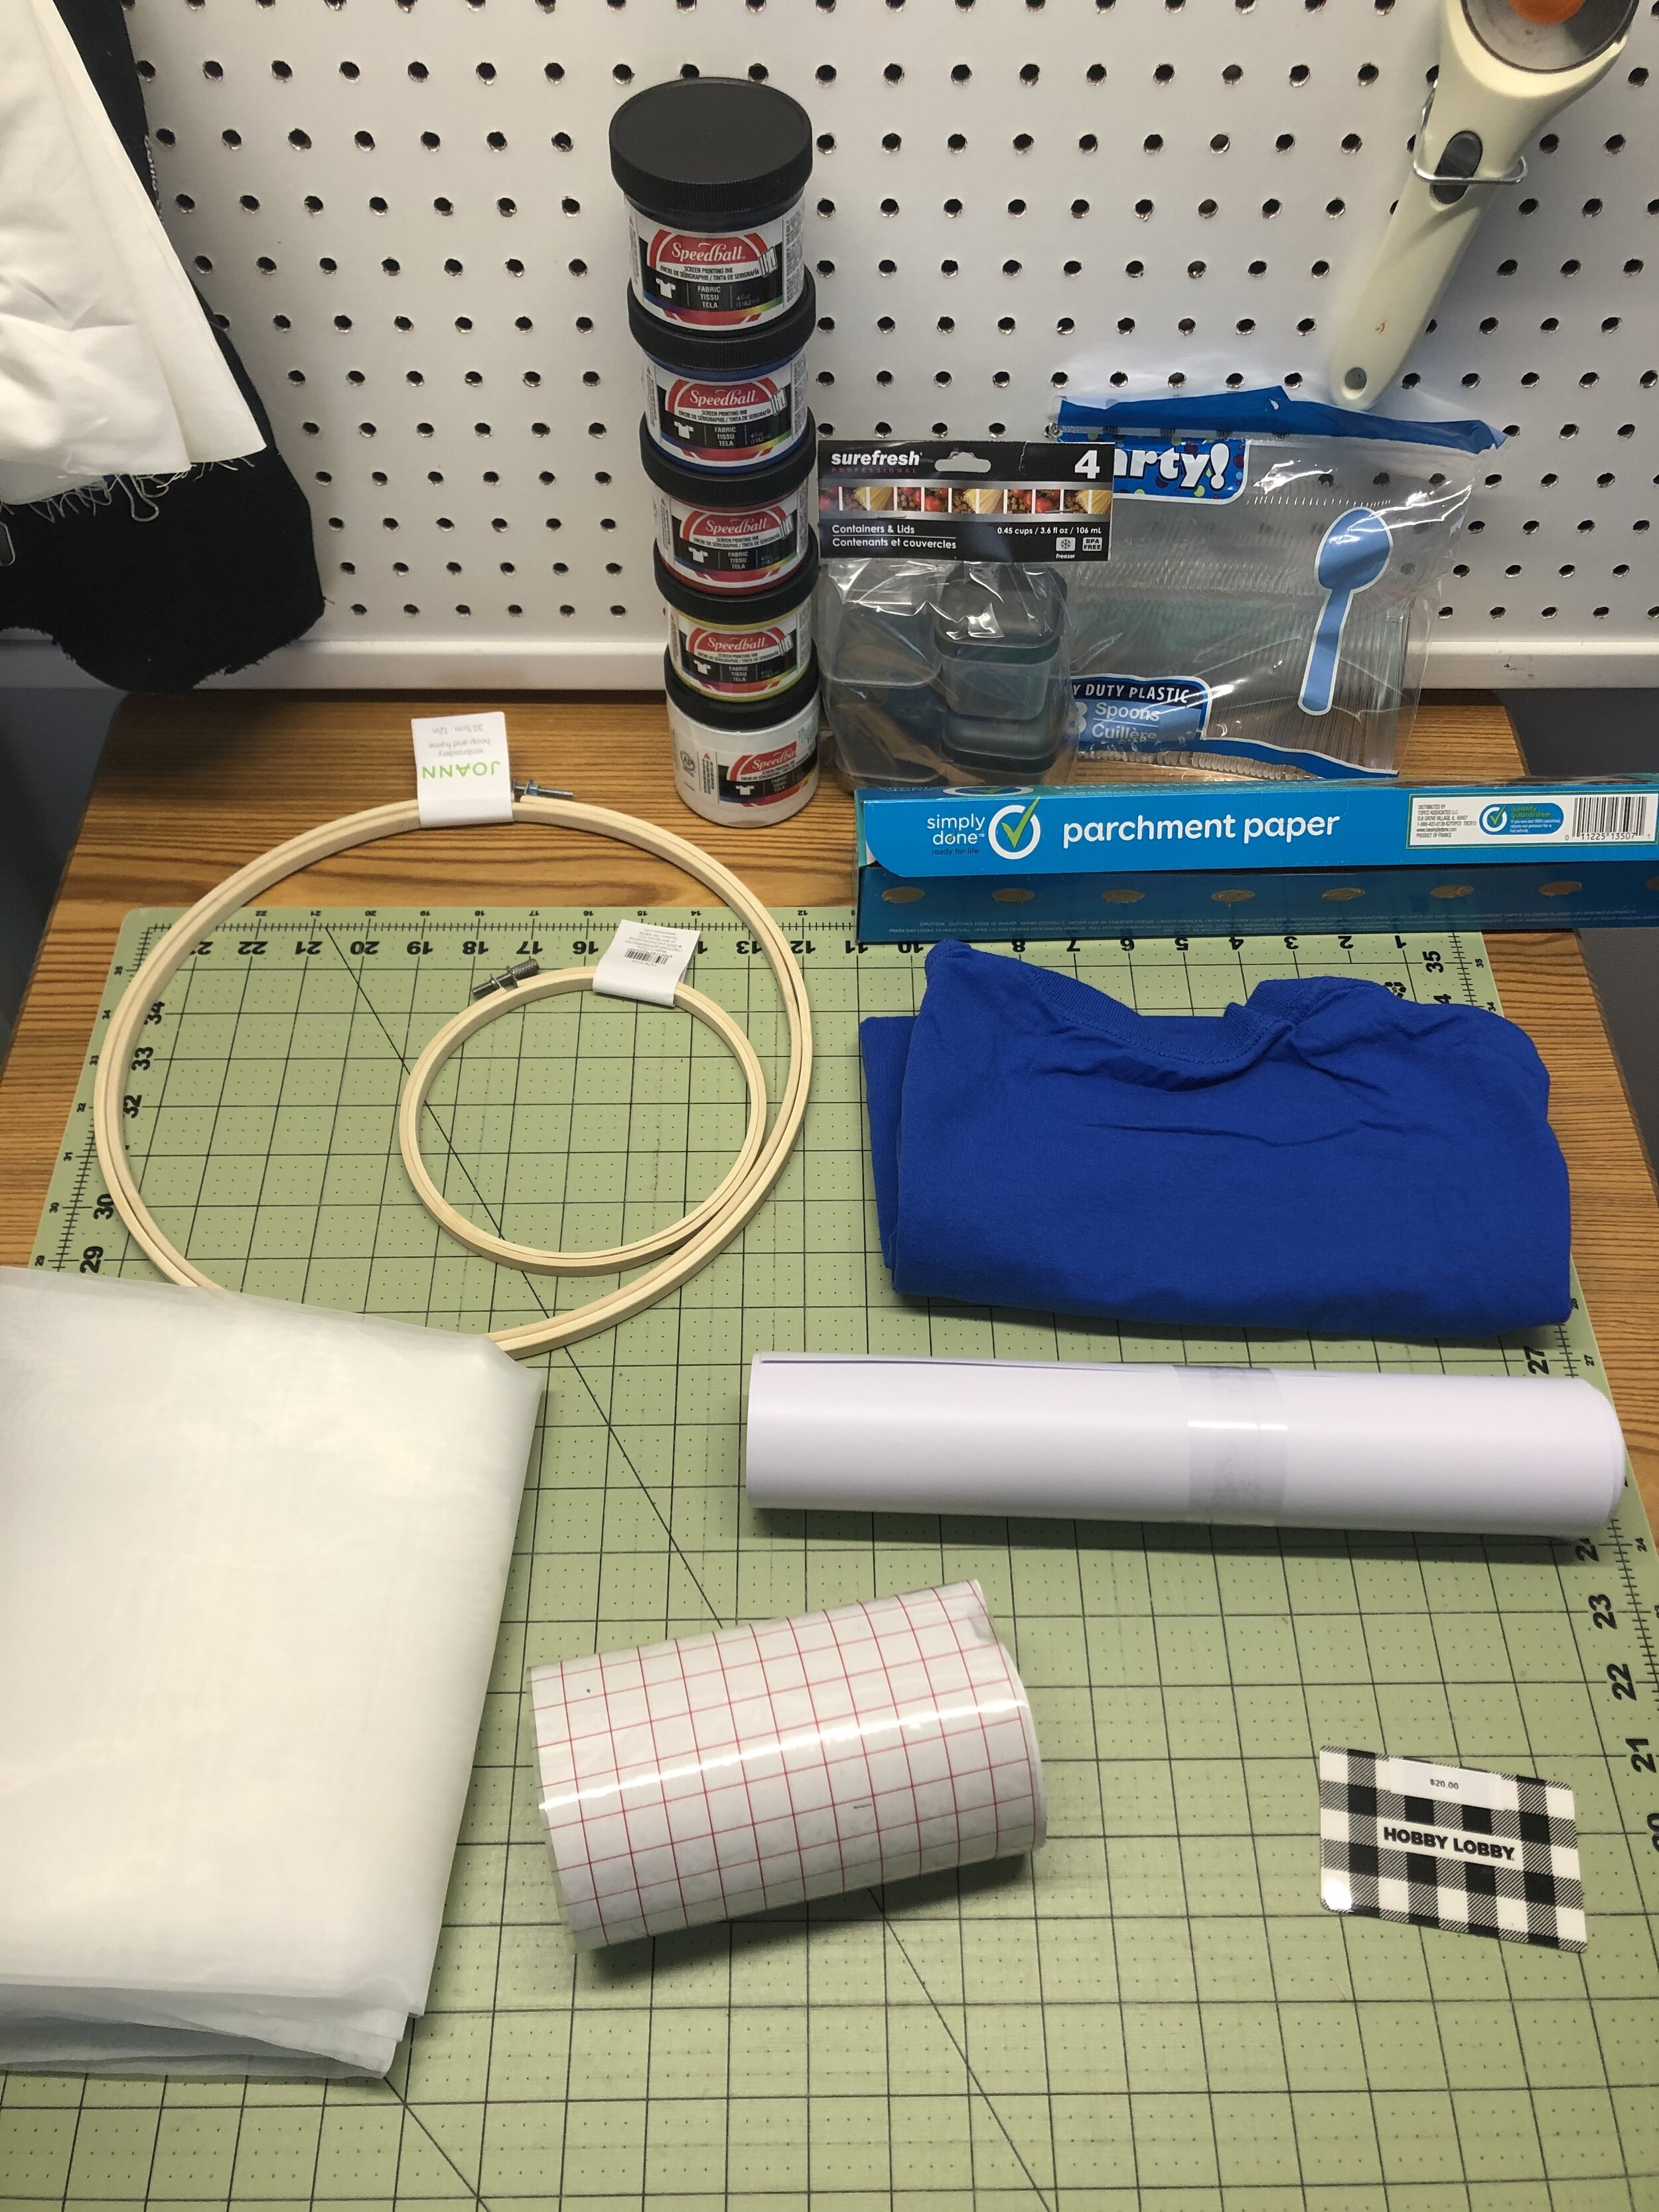
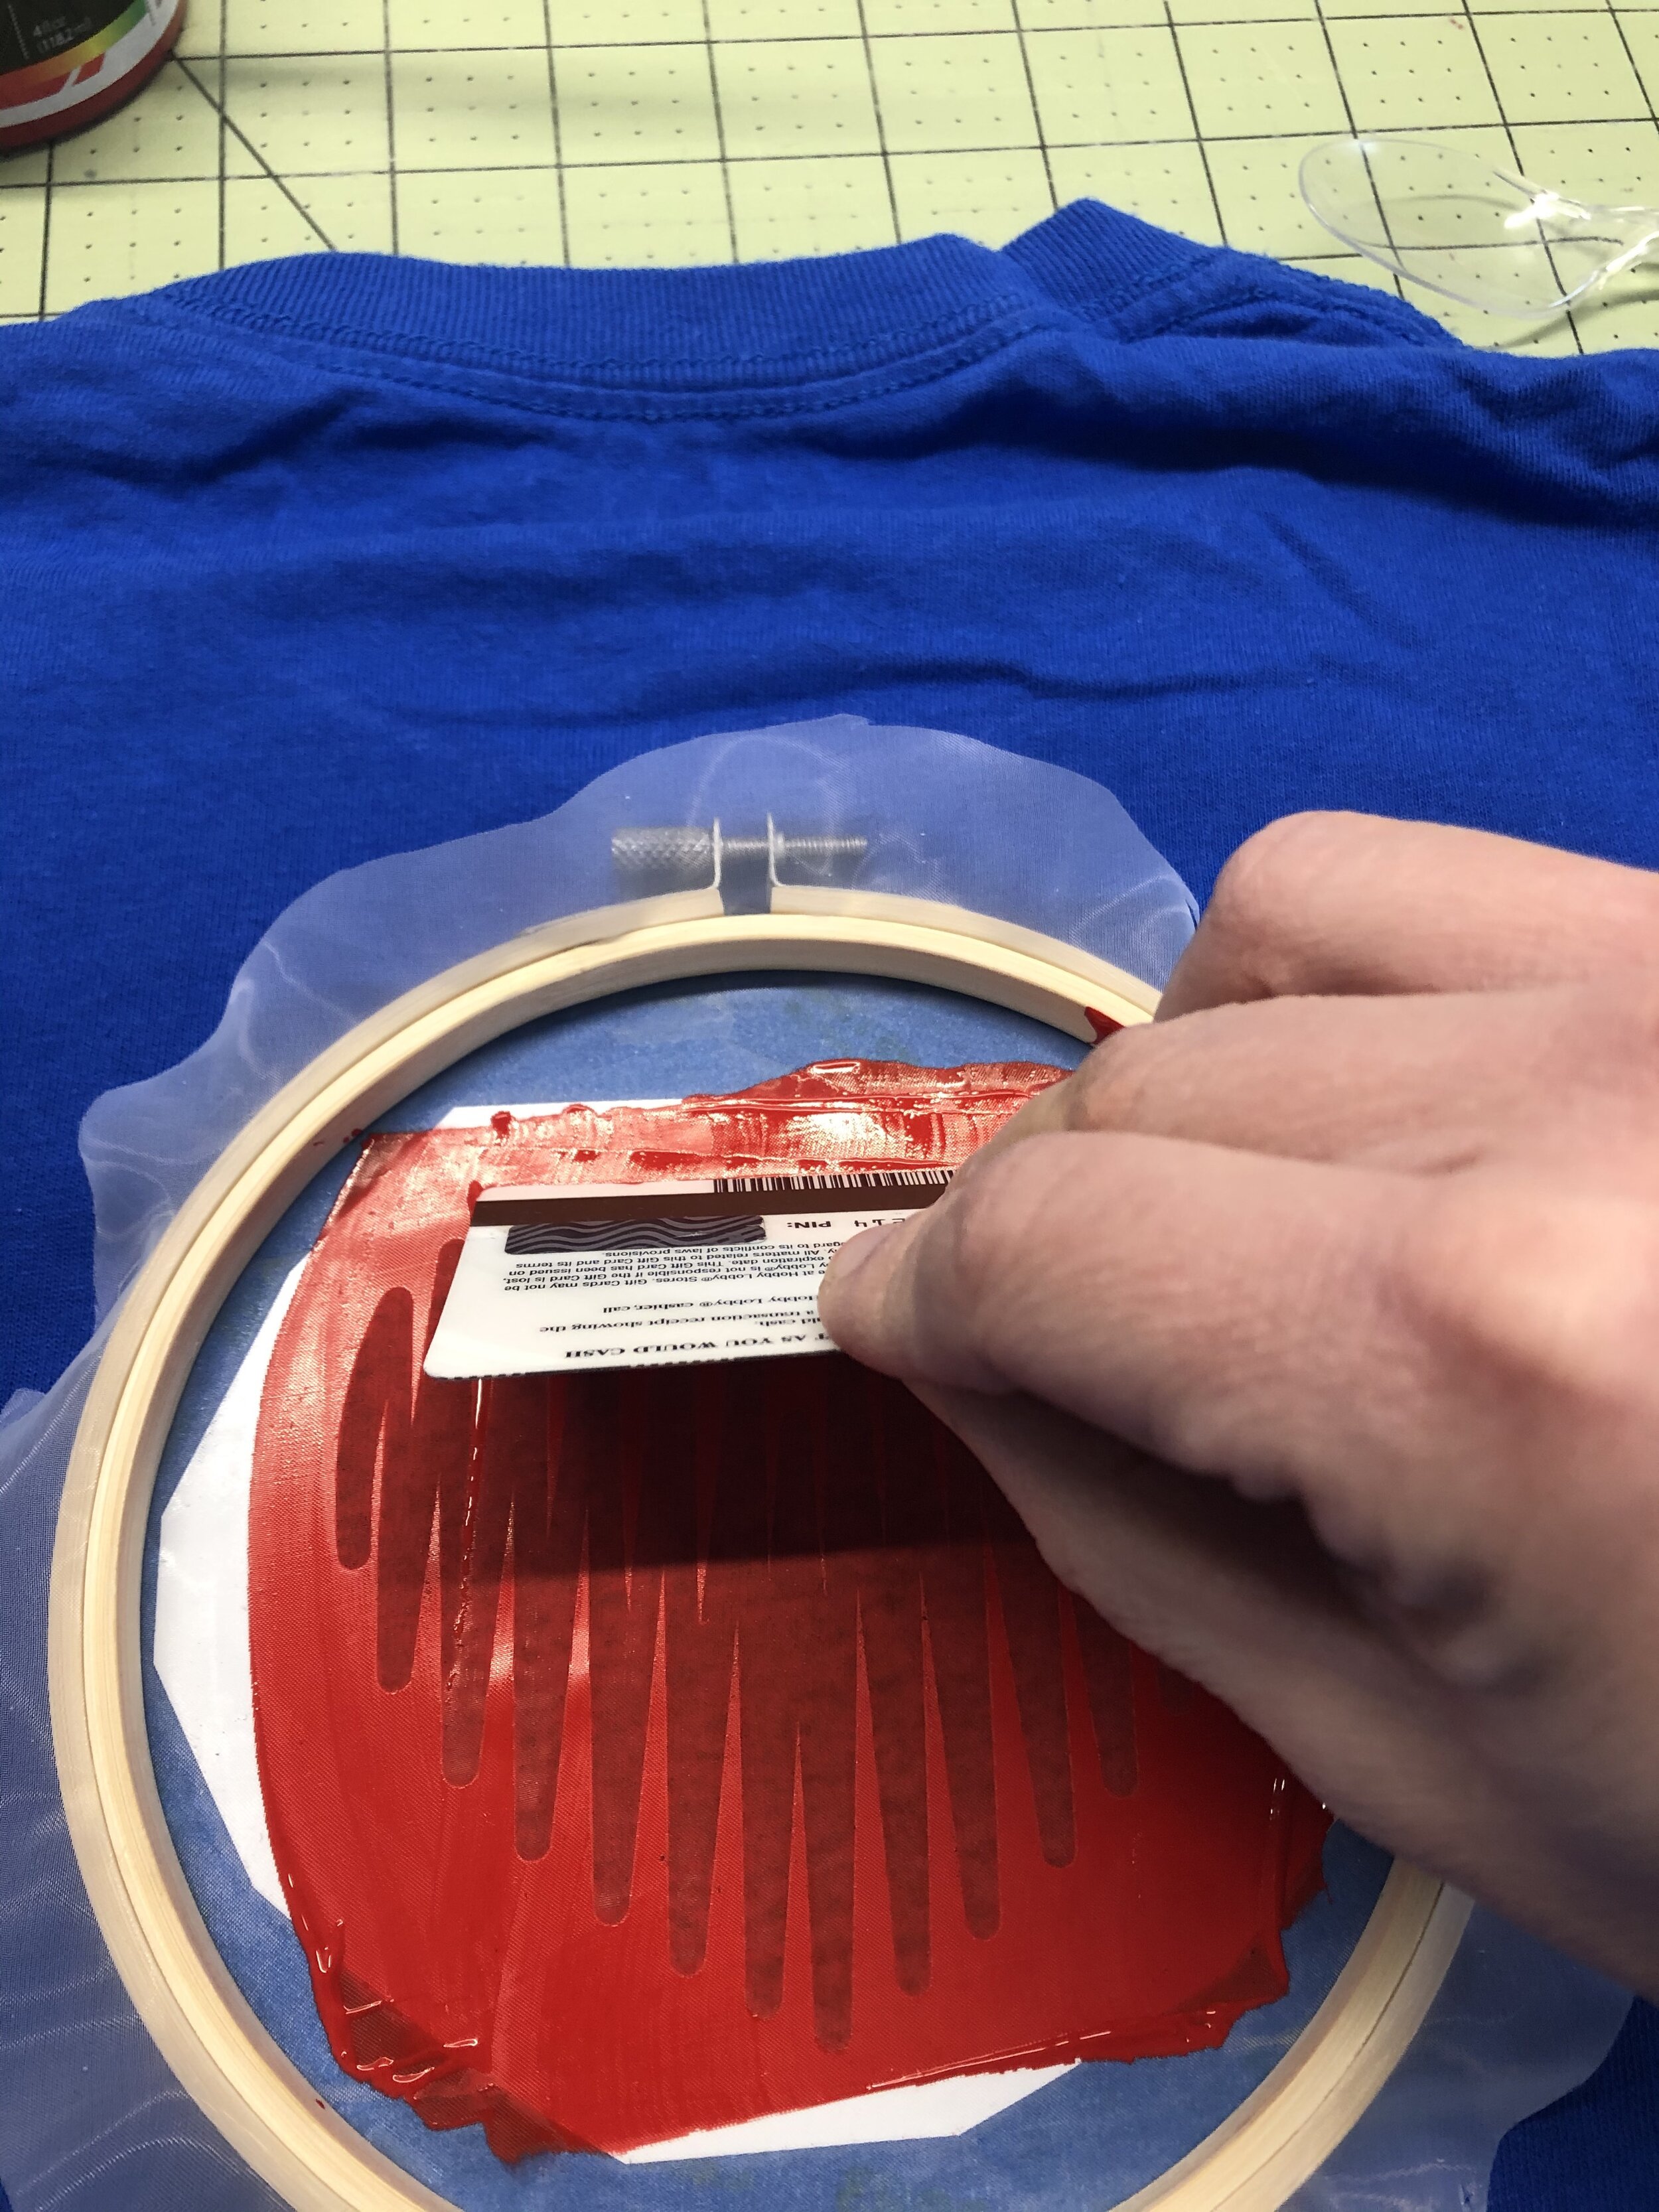
First I had to gather my supplies: a random shirt, wooden embroidery hoop, screen mesh, vinyl and transfer tape, painter’s tape, parchment paper, squeegee (aka used gift card - thanks mom!), spoons, containers, and most importantly the ink.
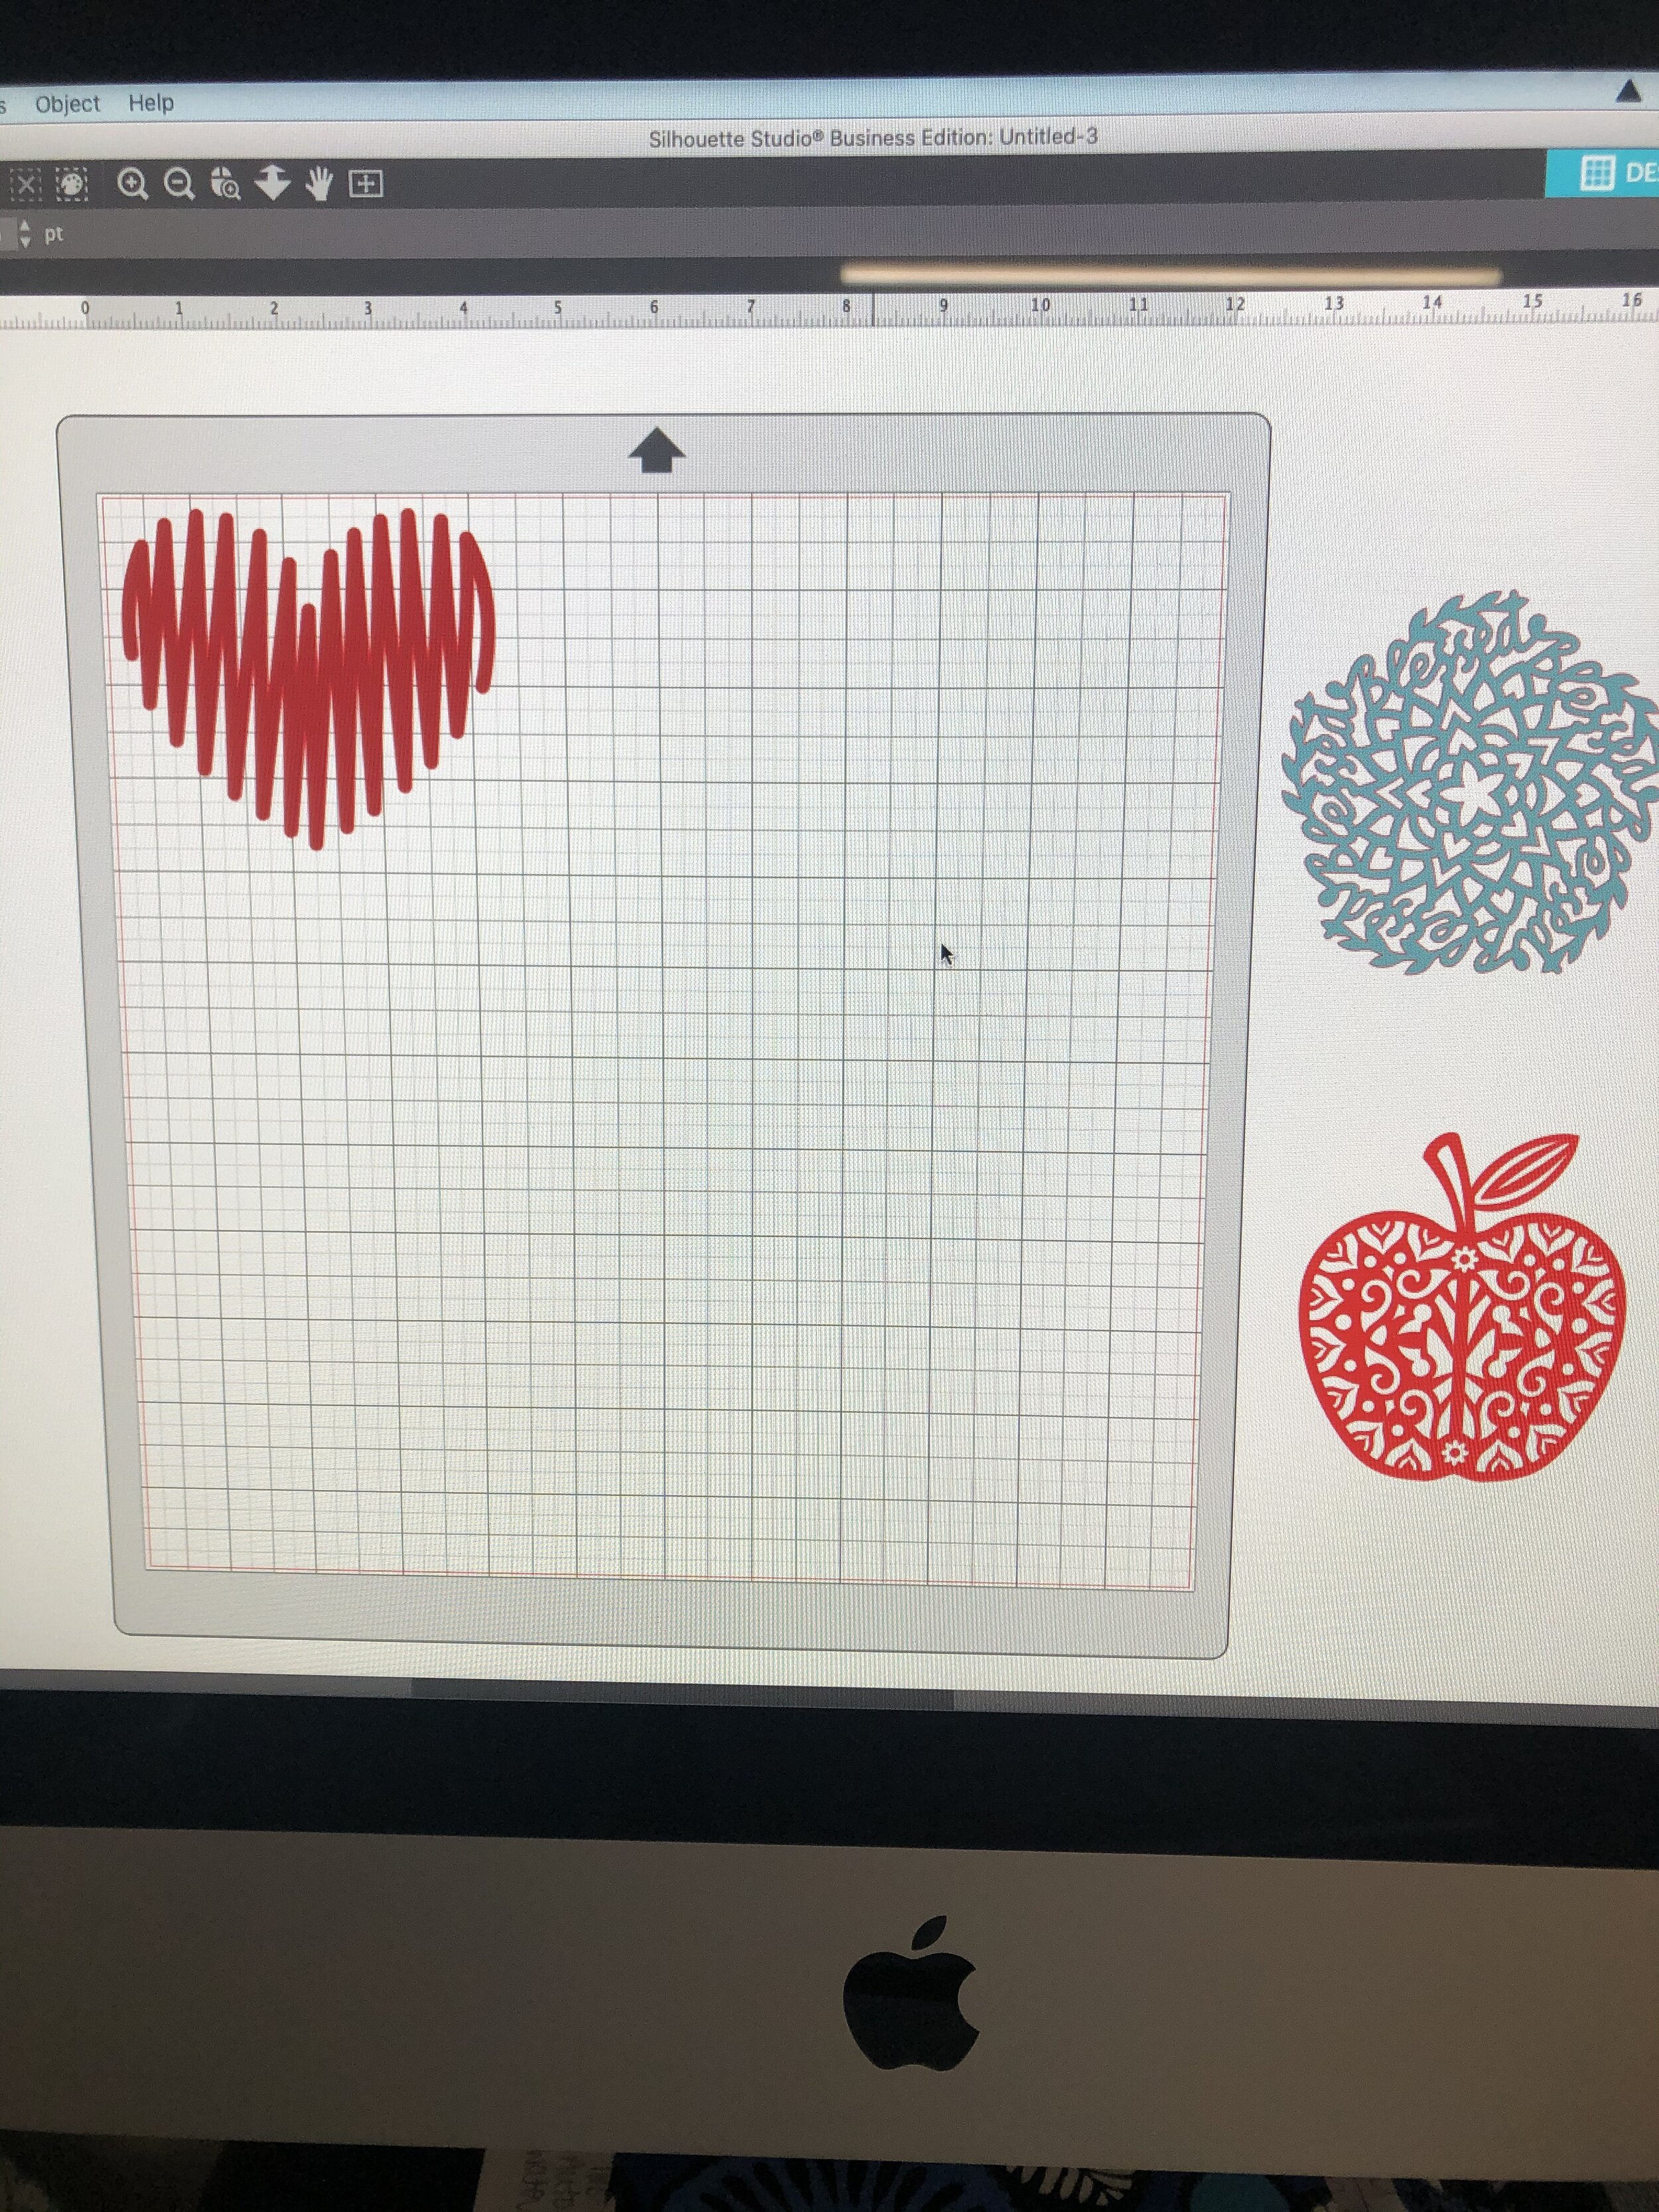
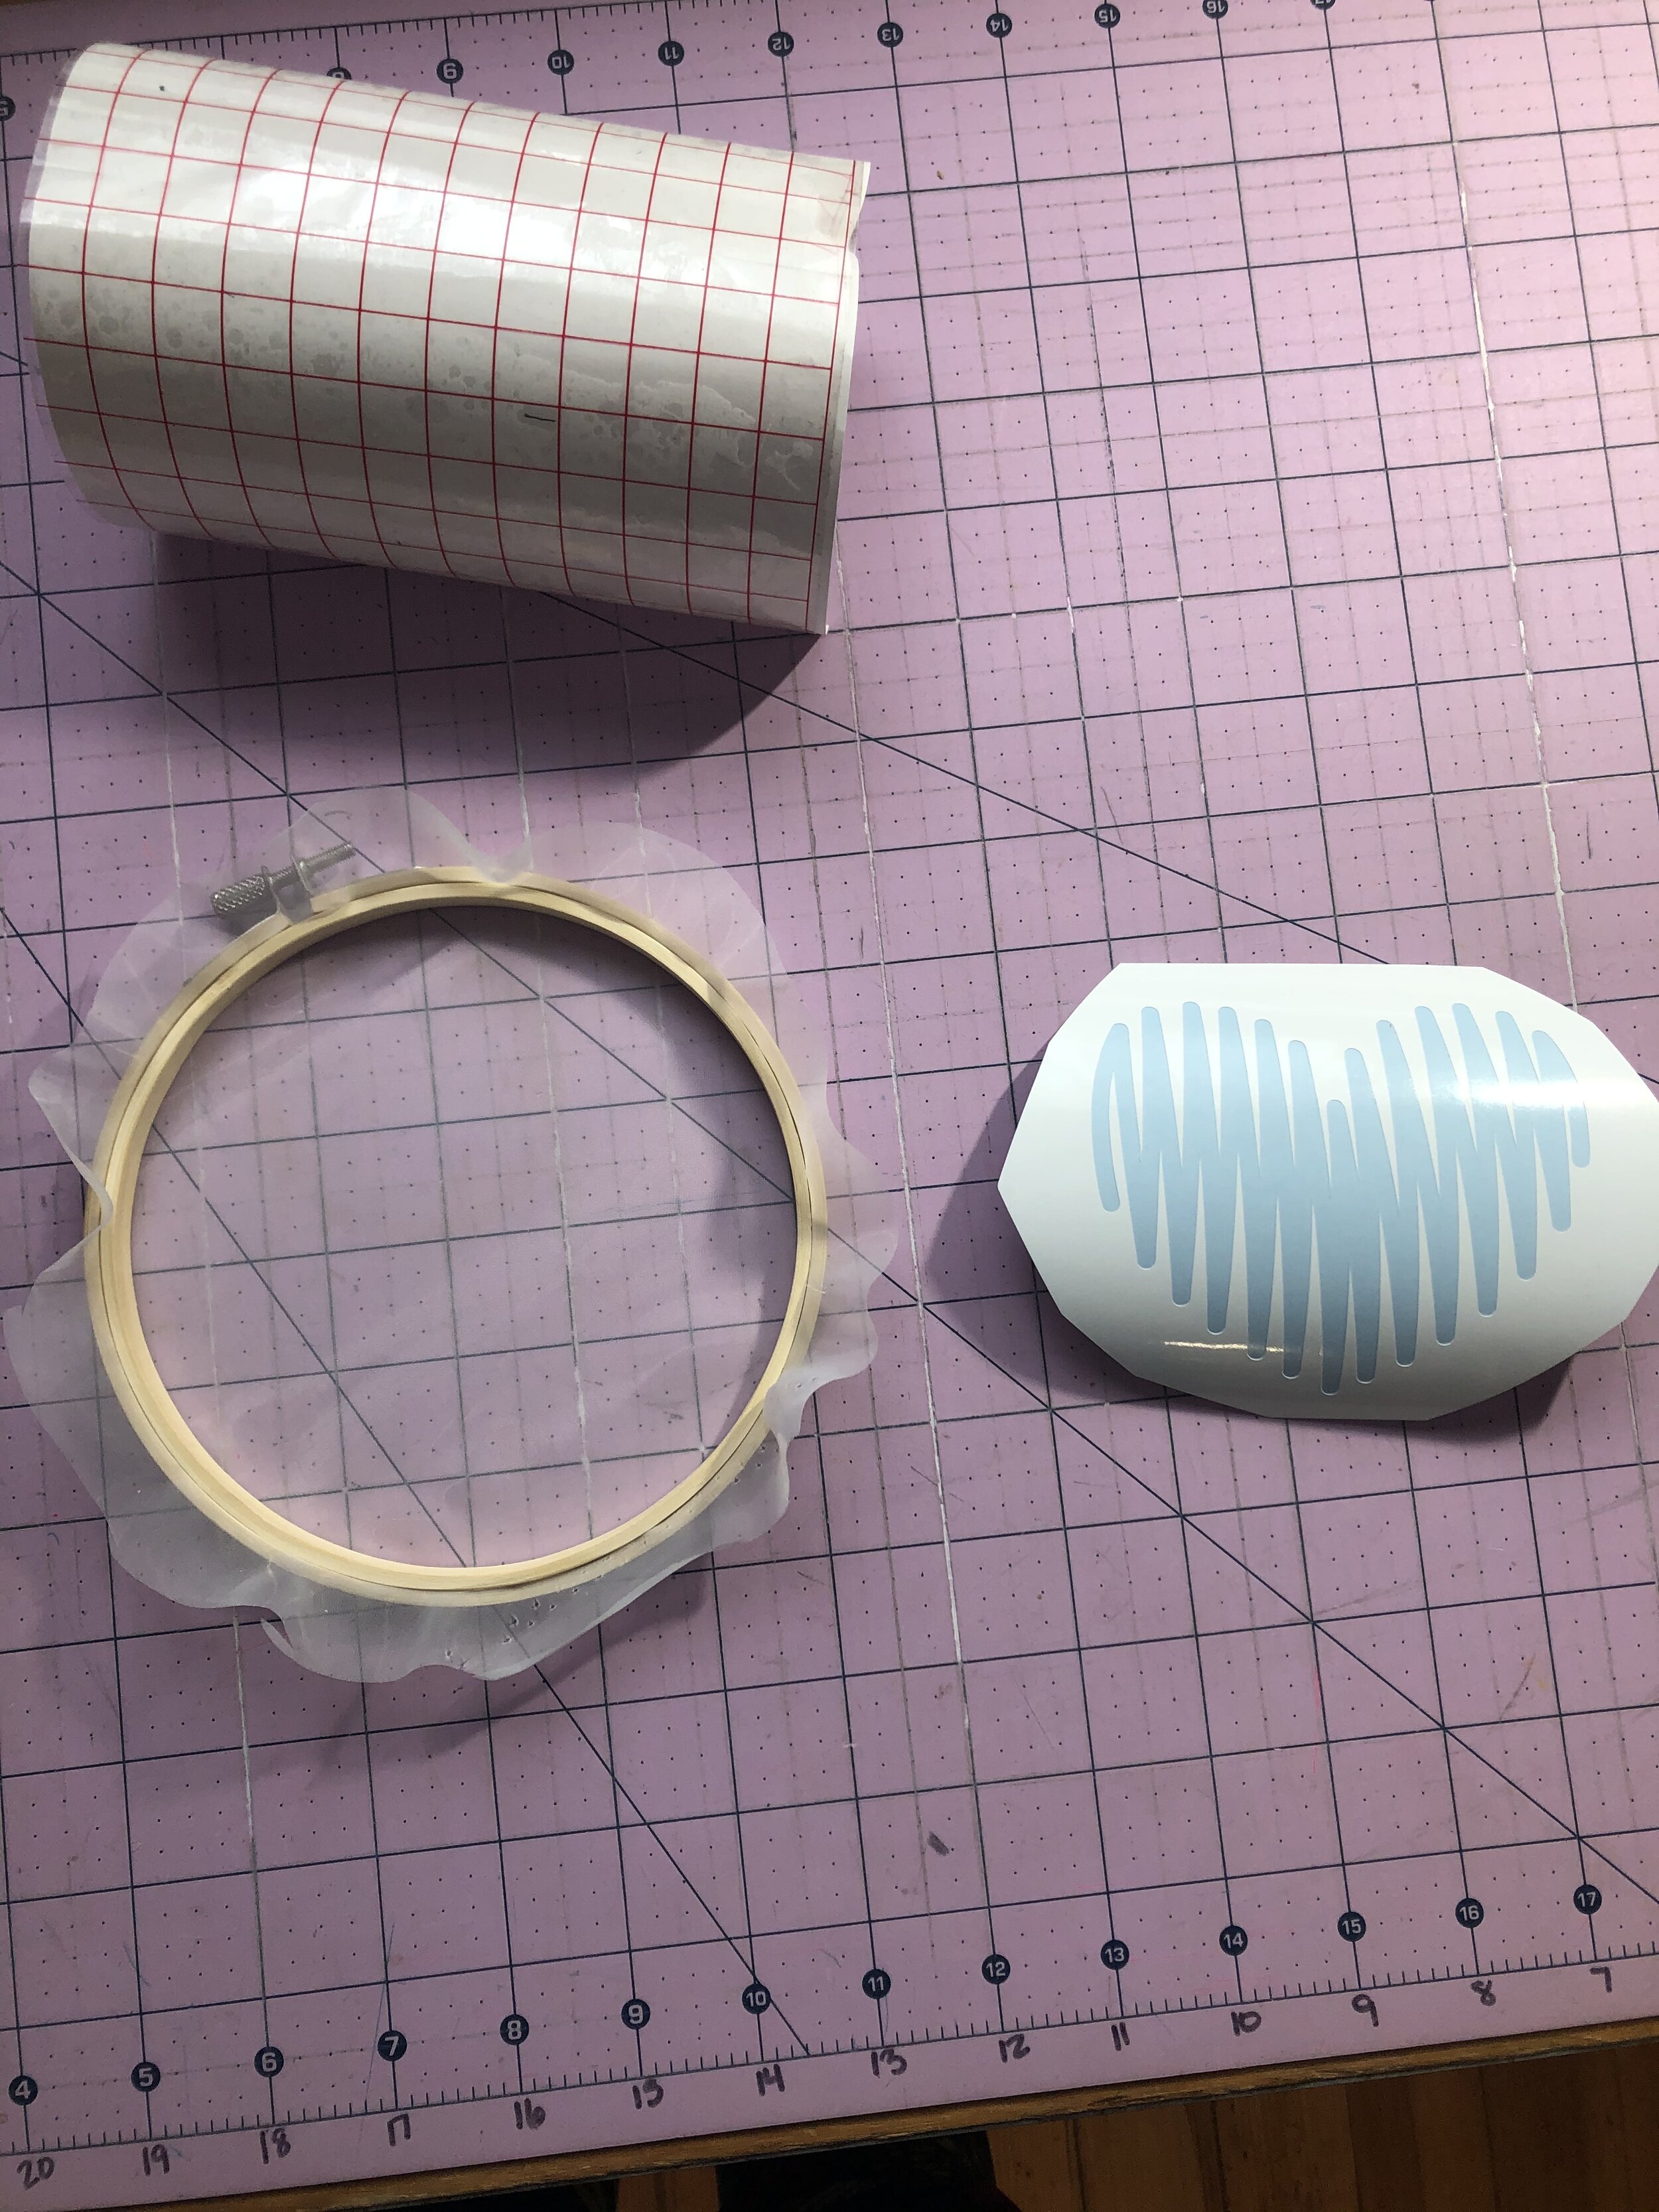
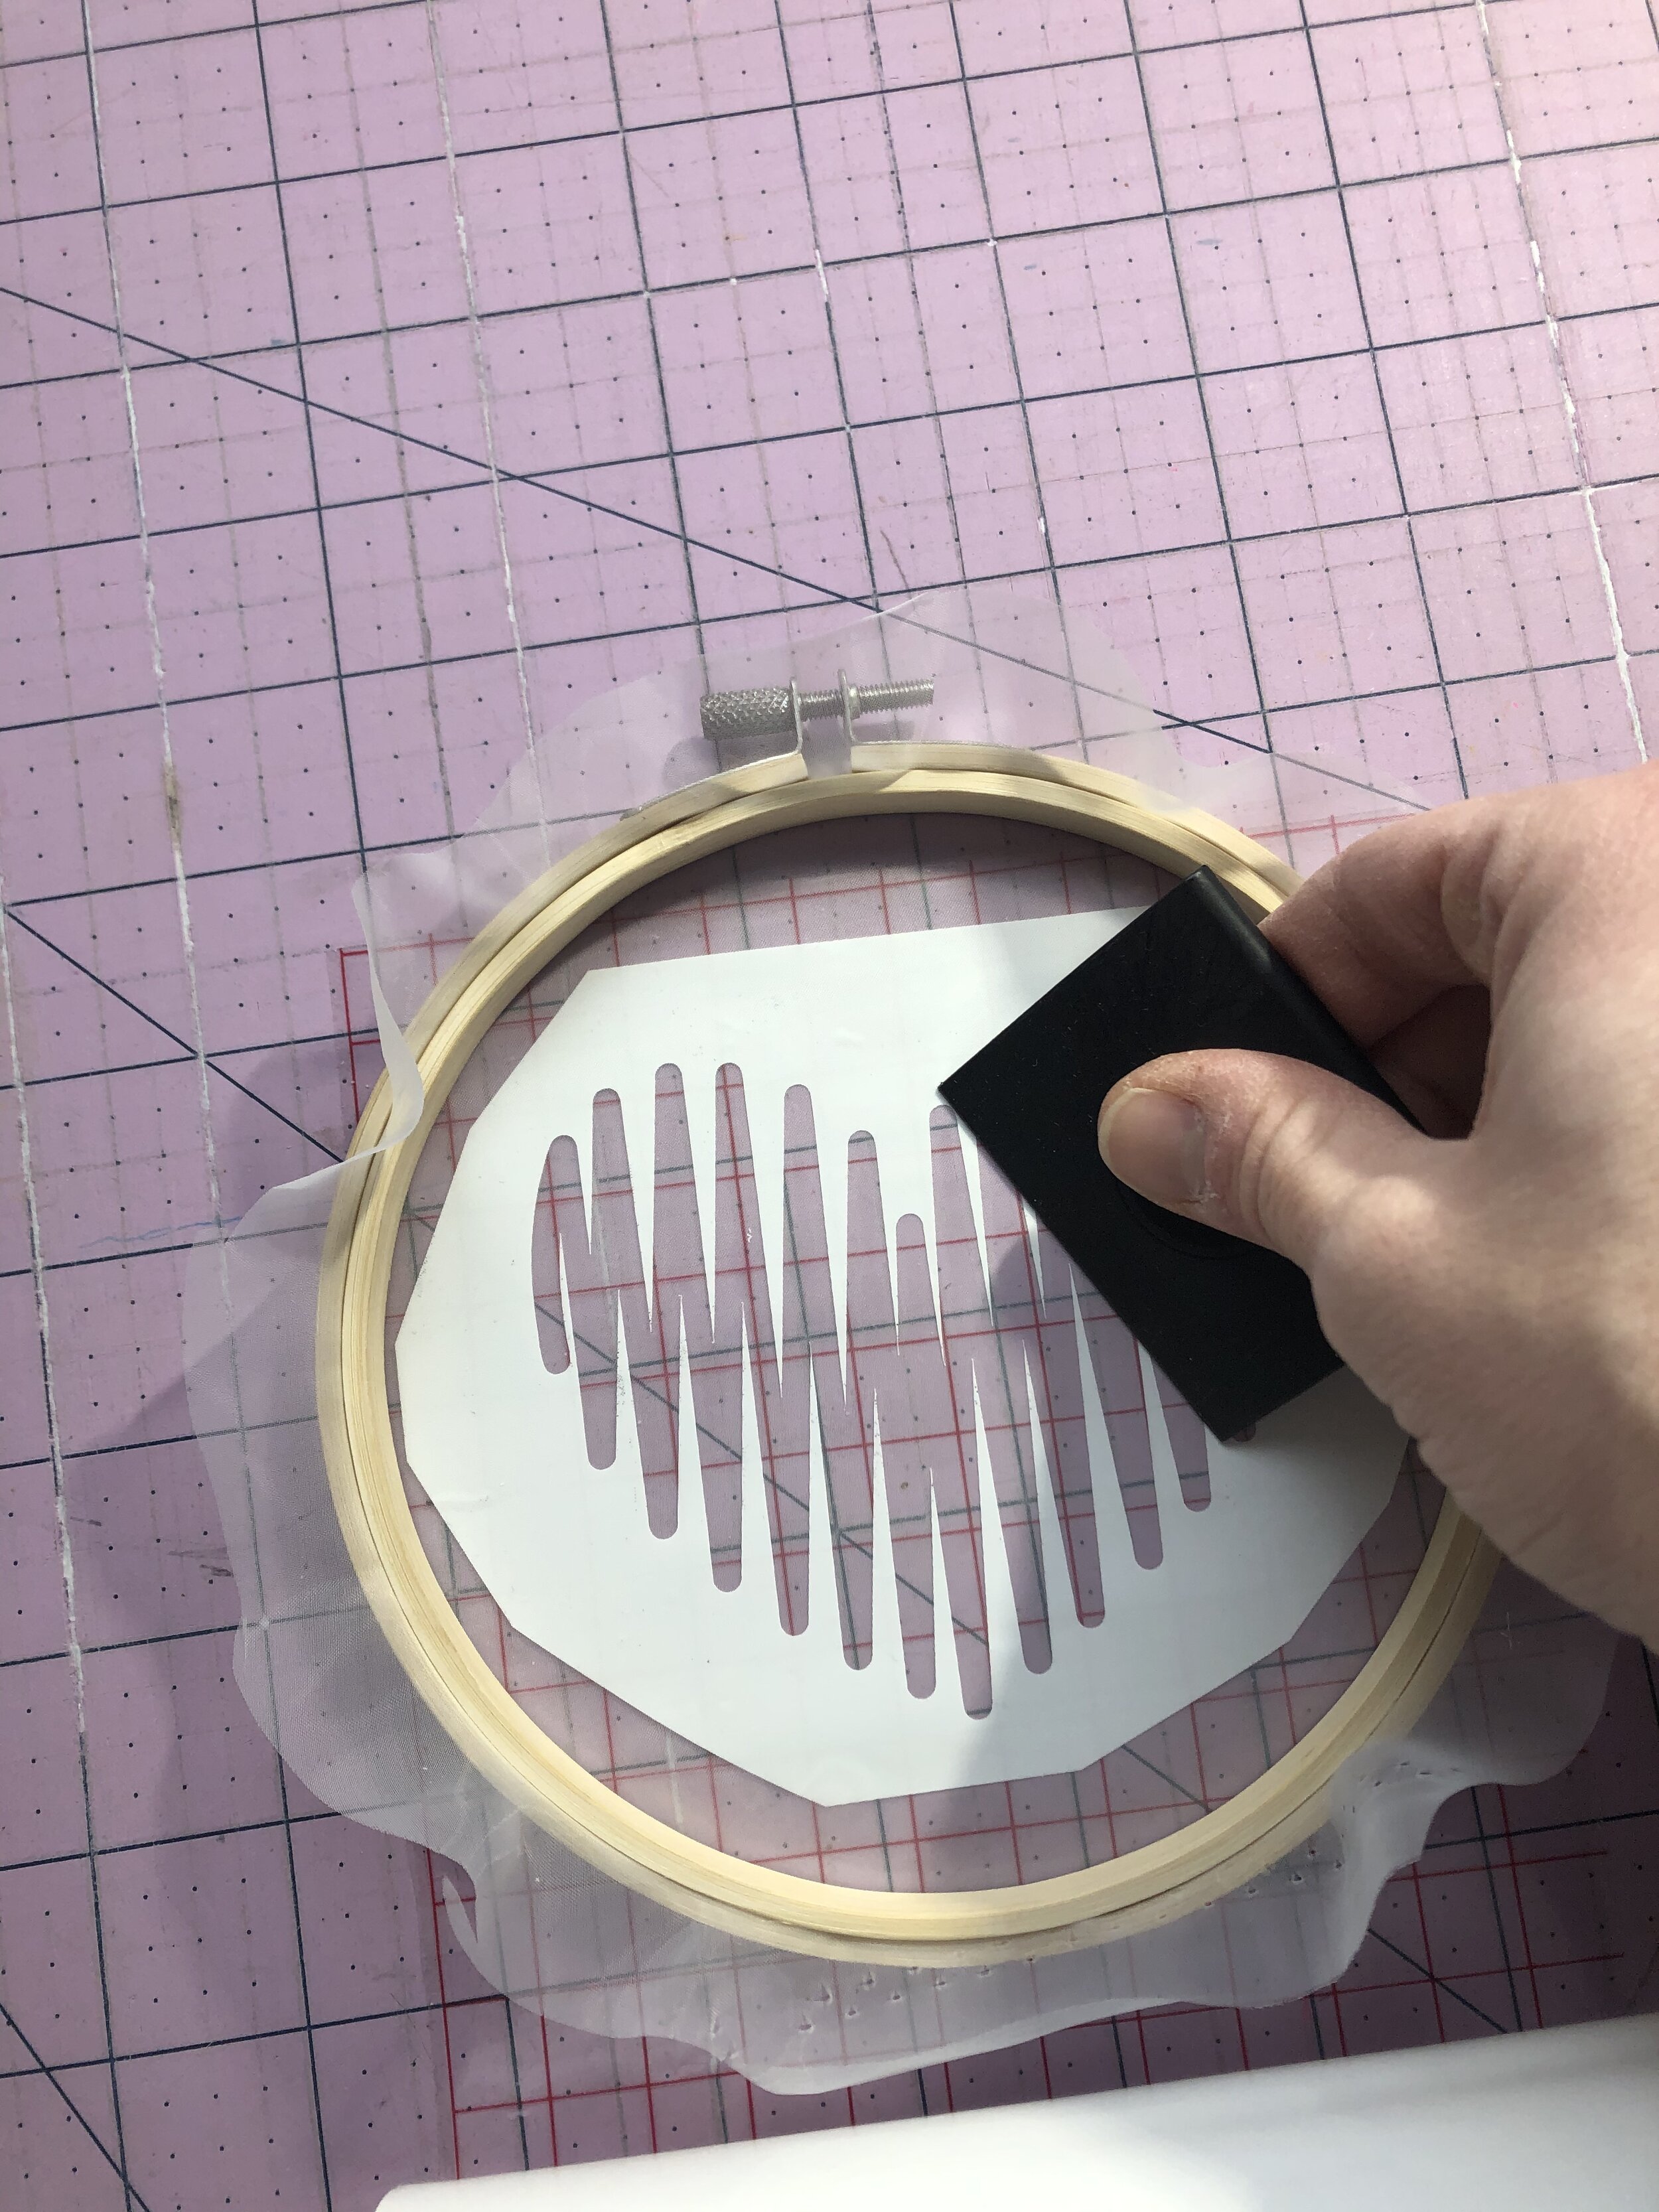
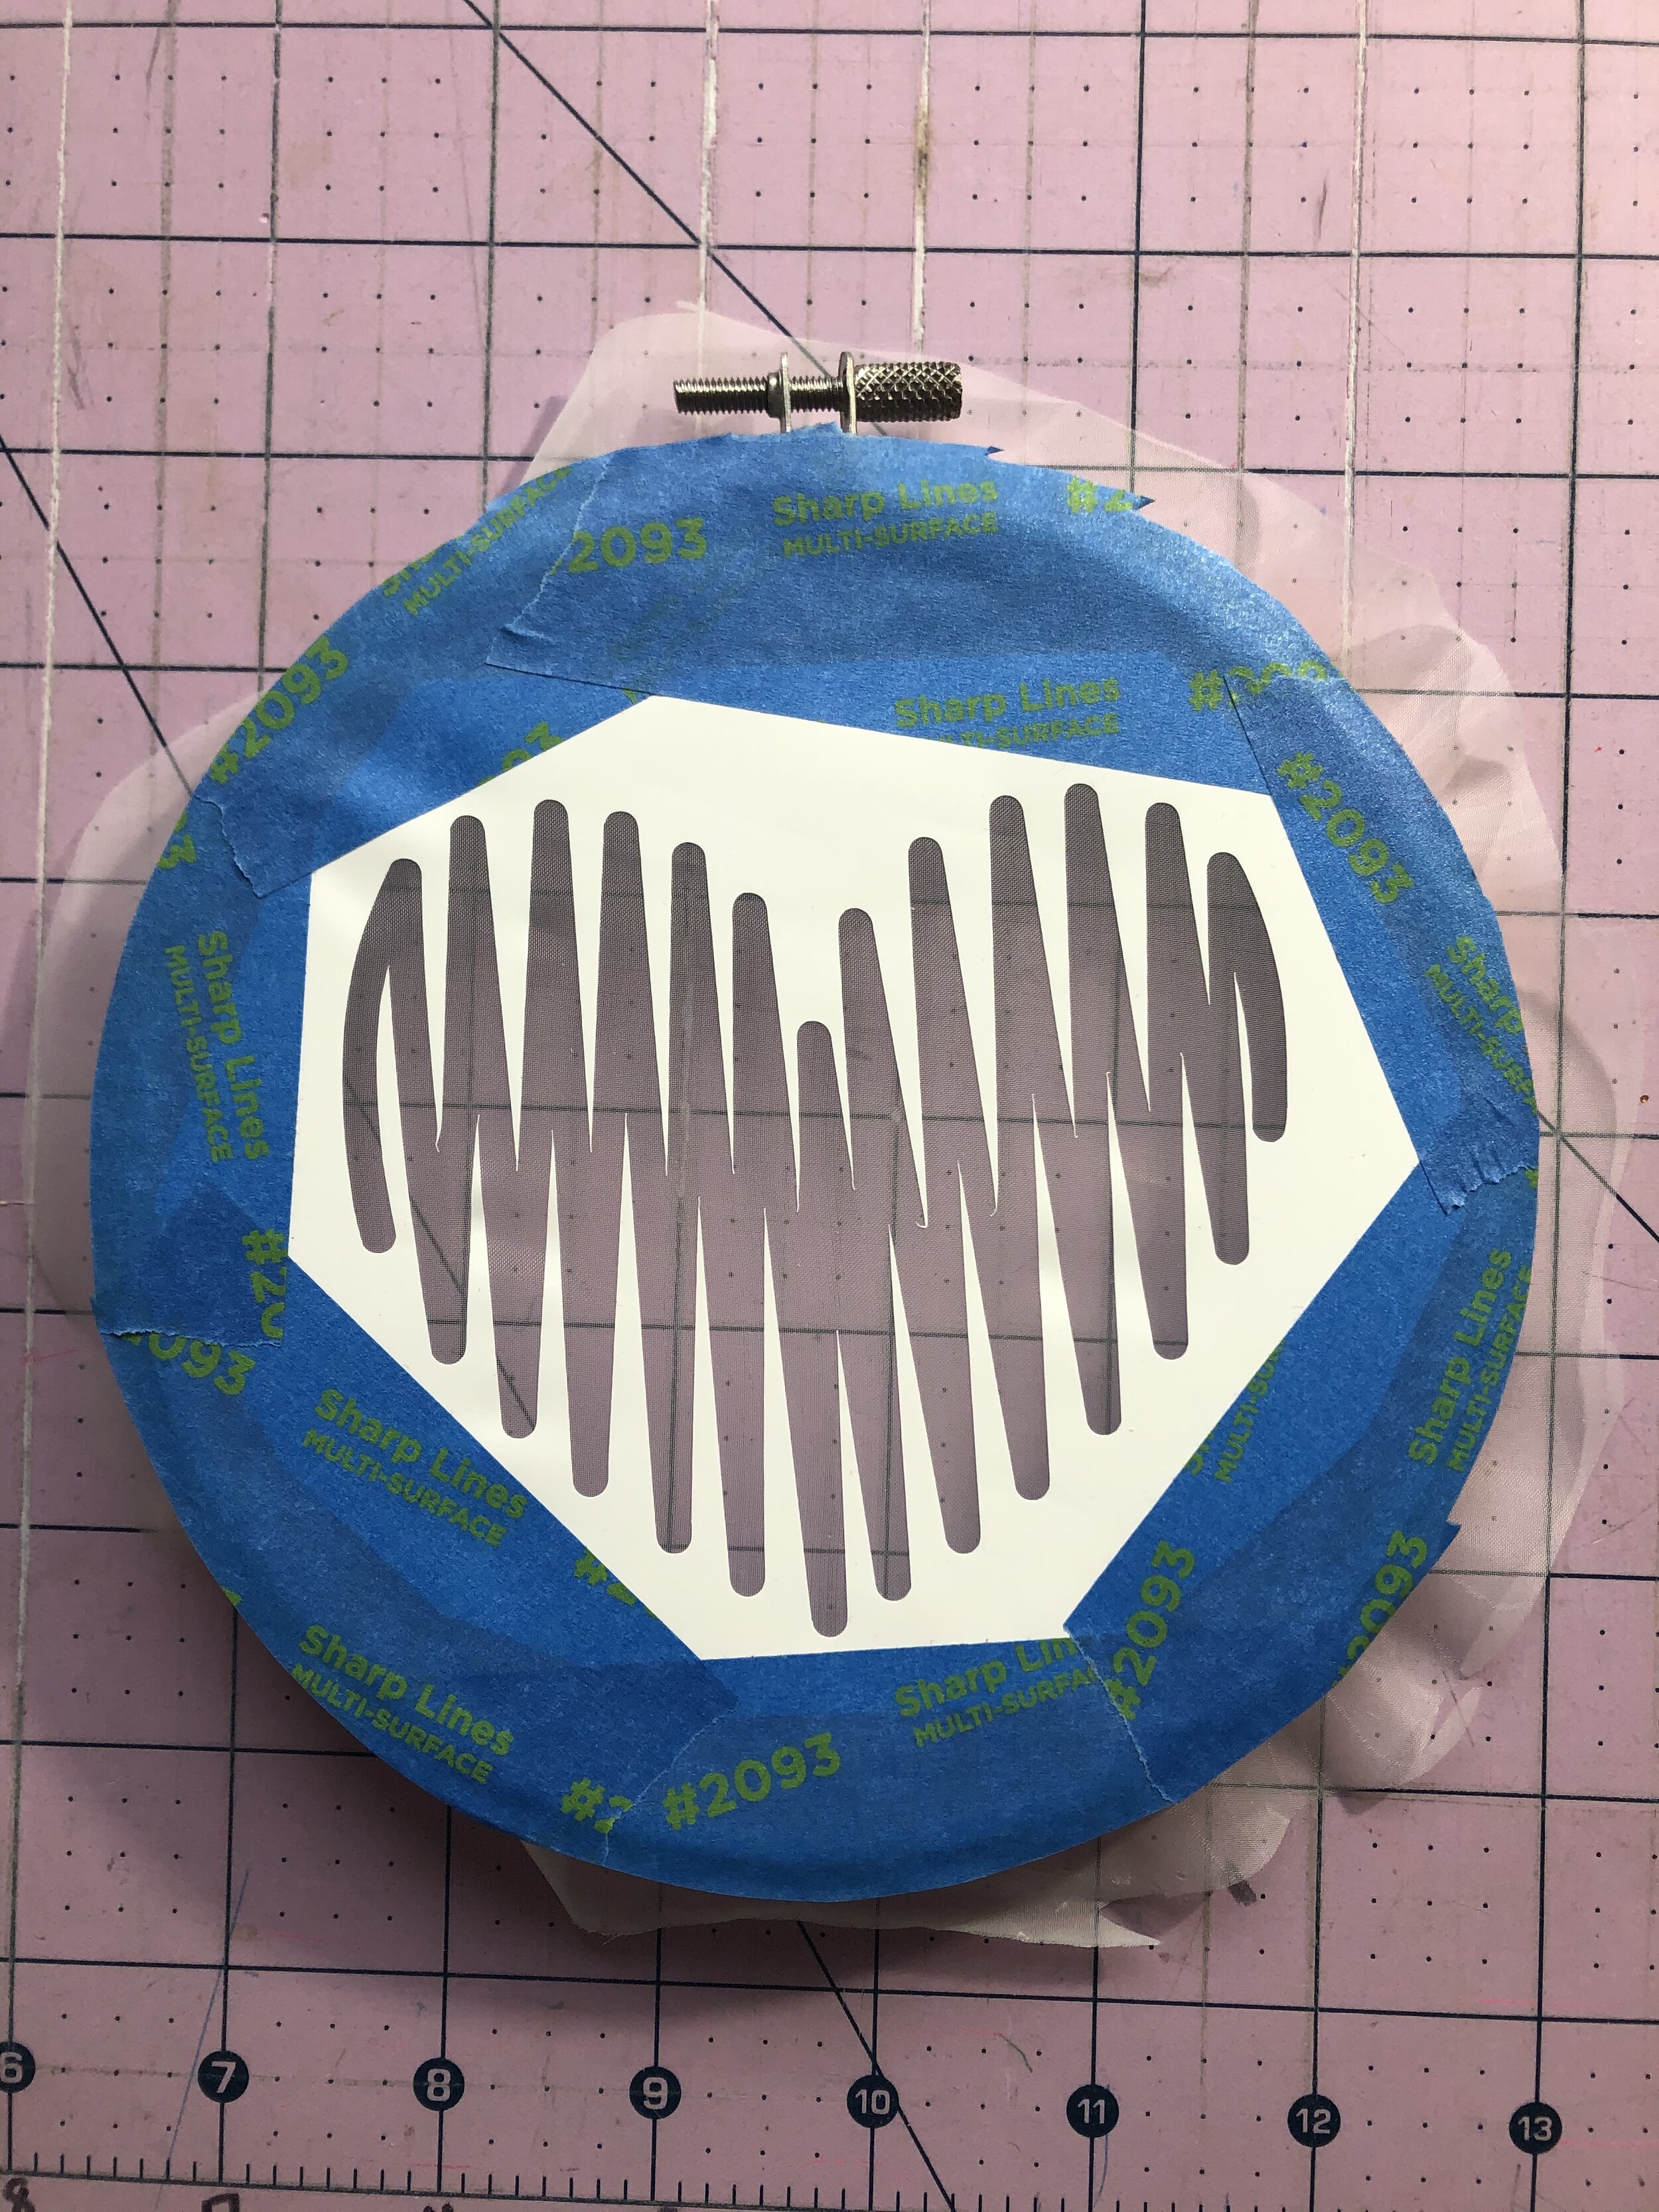
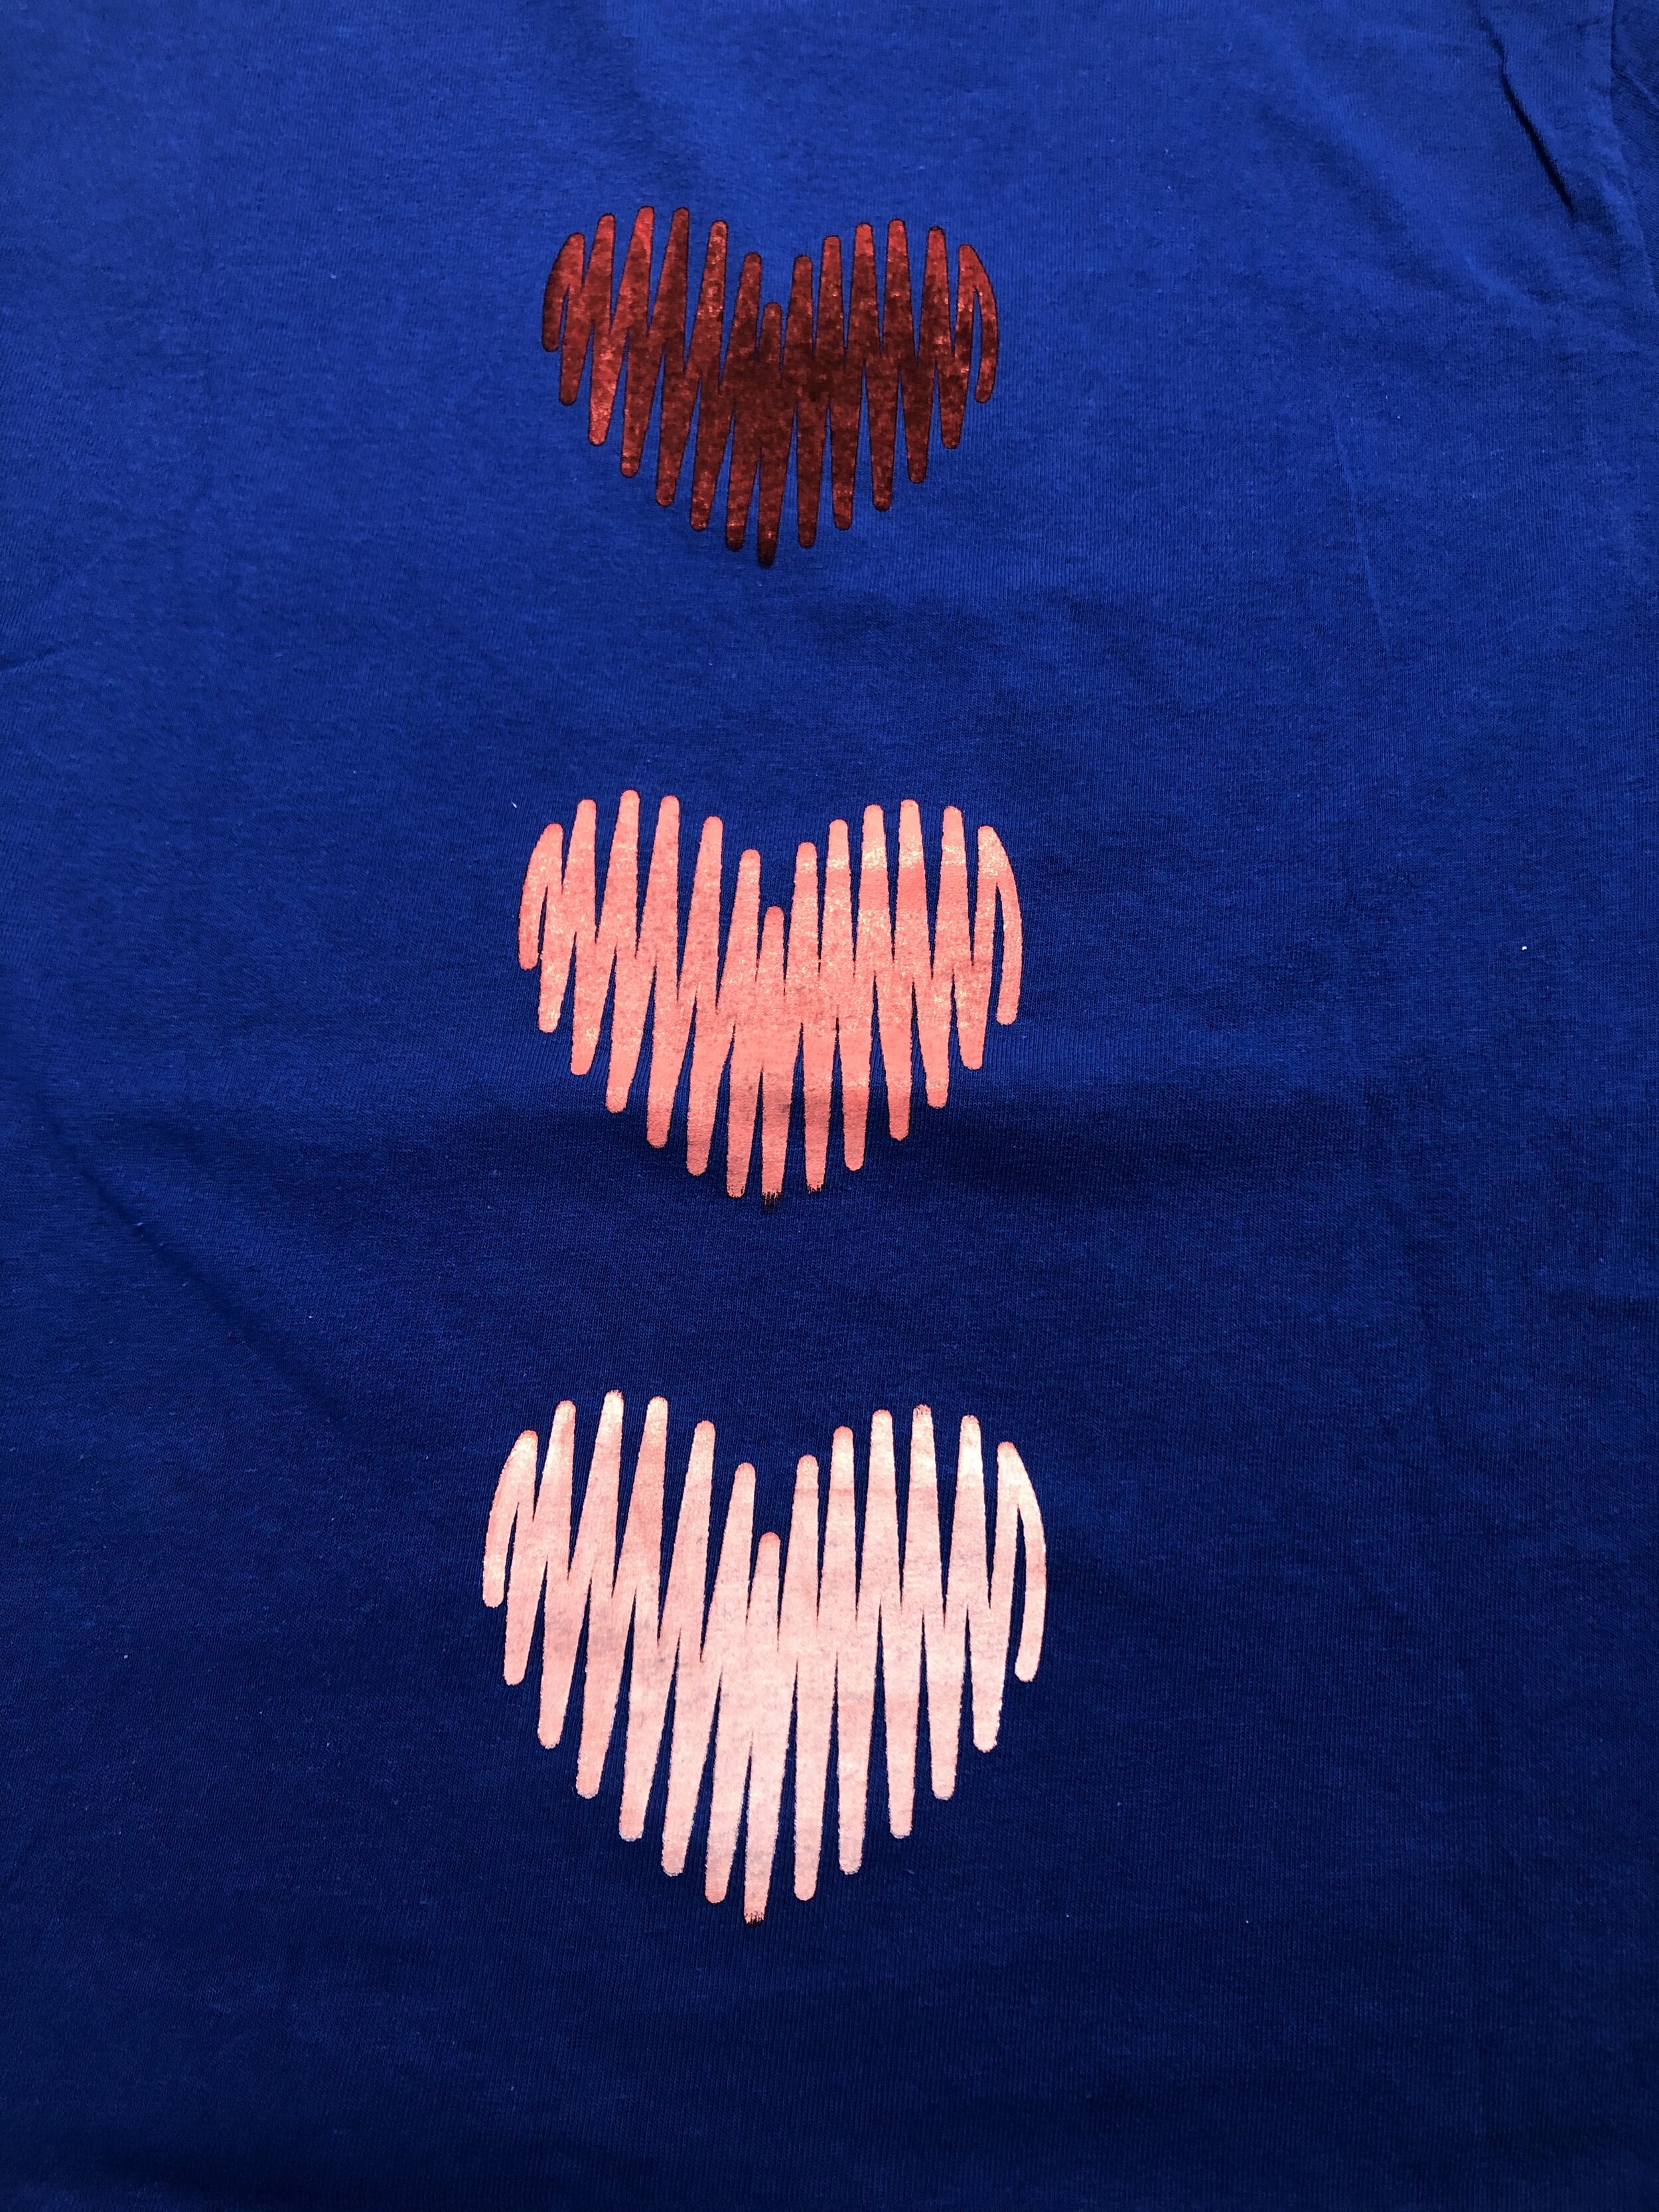
Next I went to the Silhouette Studio to determine what design I wanted to use and what size to make it. Since this was around Valentine’s Day, and I didn’t want to go too big, I decided on a simple heart. I made it a size to fit in the smaller, 6” hoop. I cut it out, reverse weeded it, and applied it to the screen (that had previously been hooped). The design has to be reversed because it is on the bottom of the screen, touching the fabric. I then taped off the rest of the screen around the vinyl so that any extra ink would not get on the shirt.
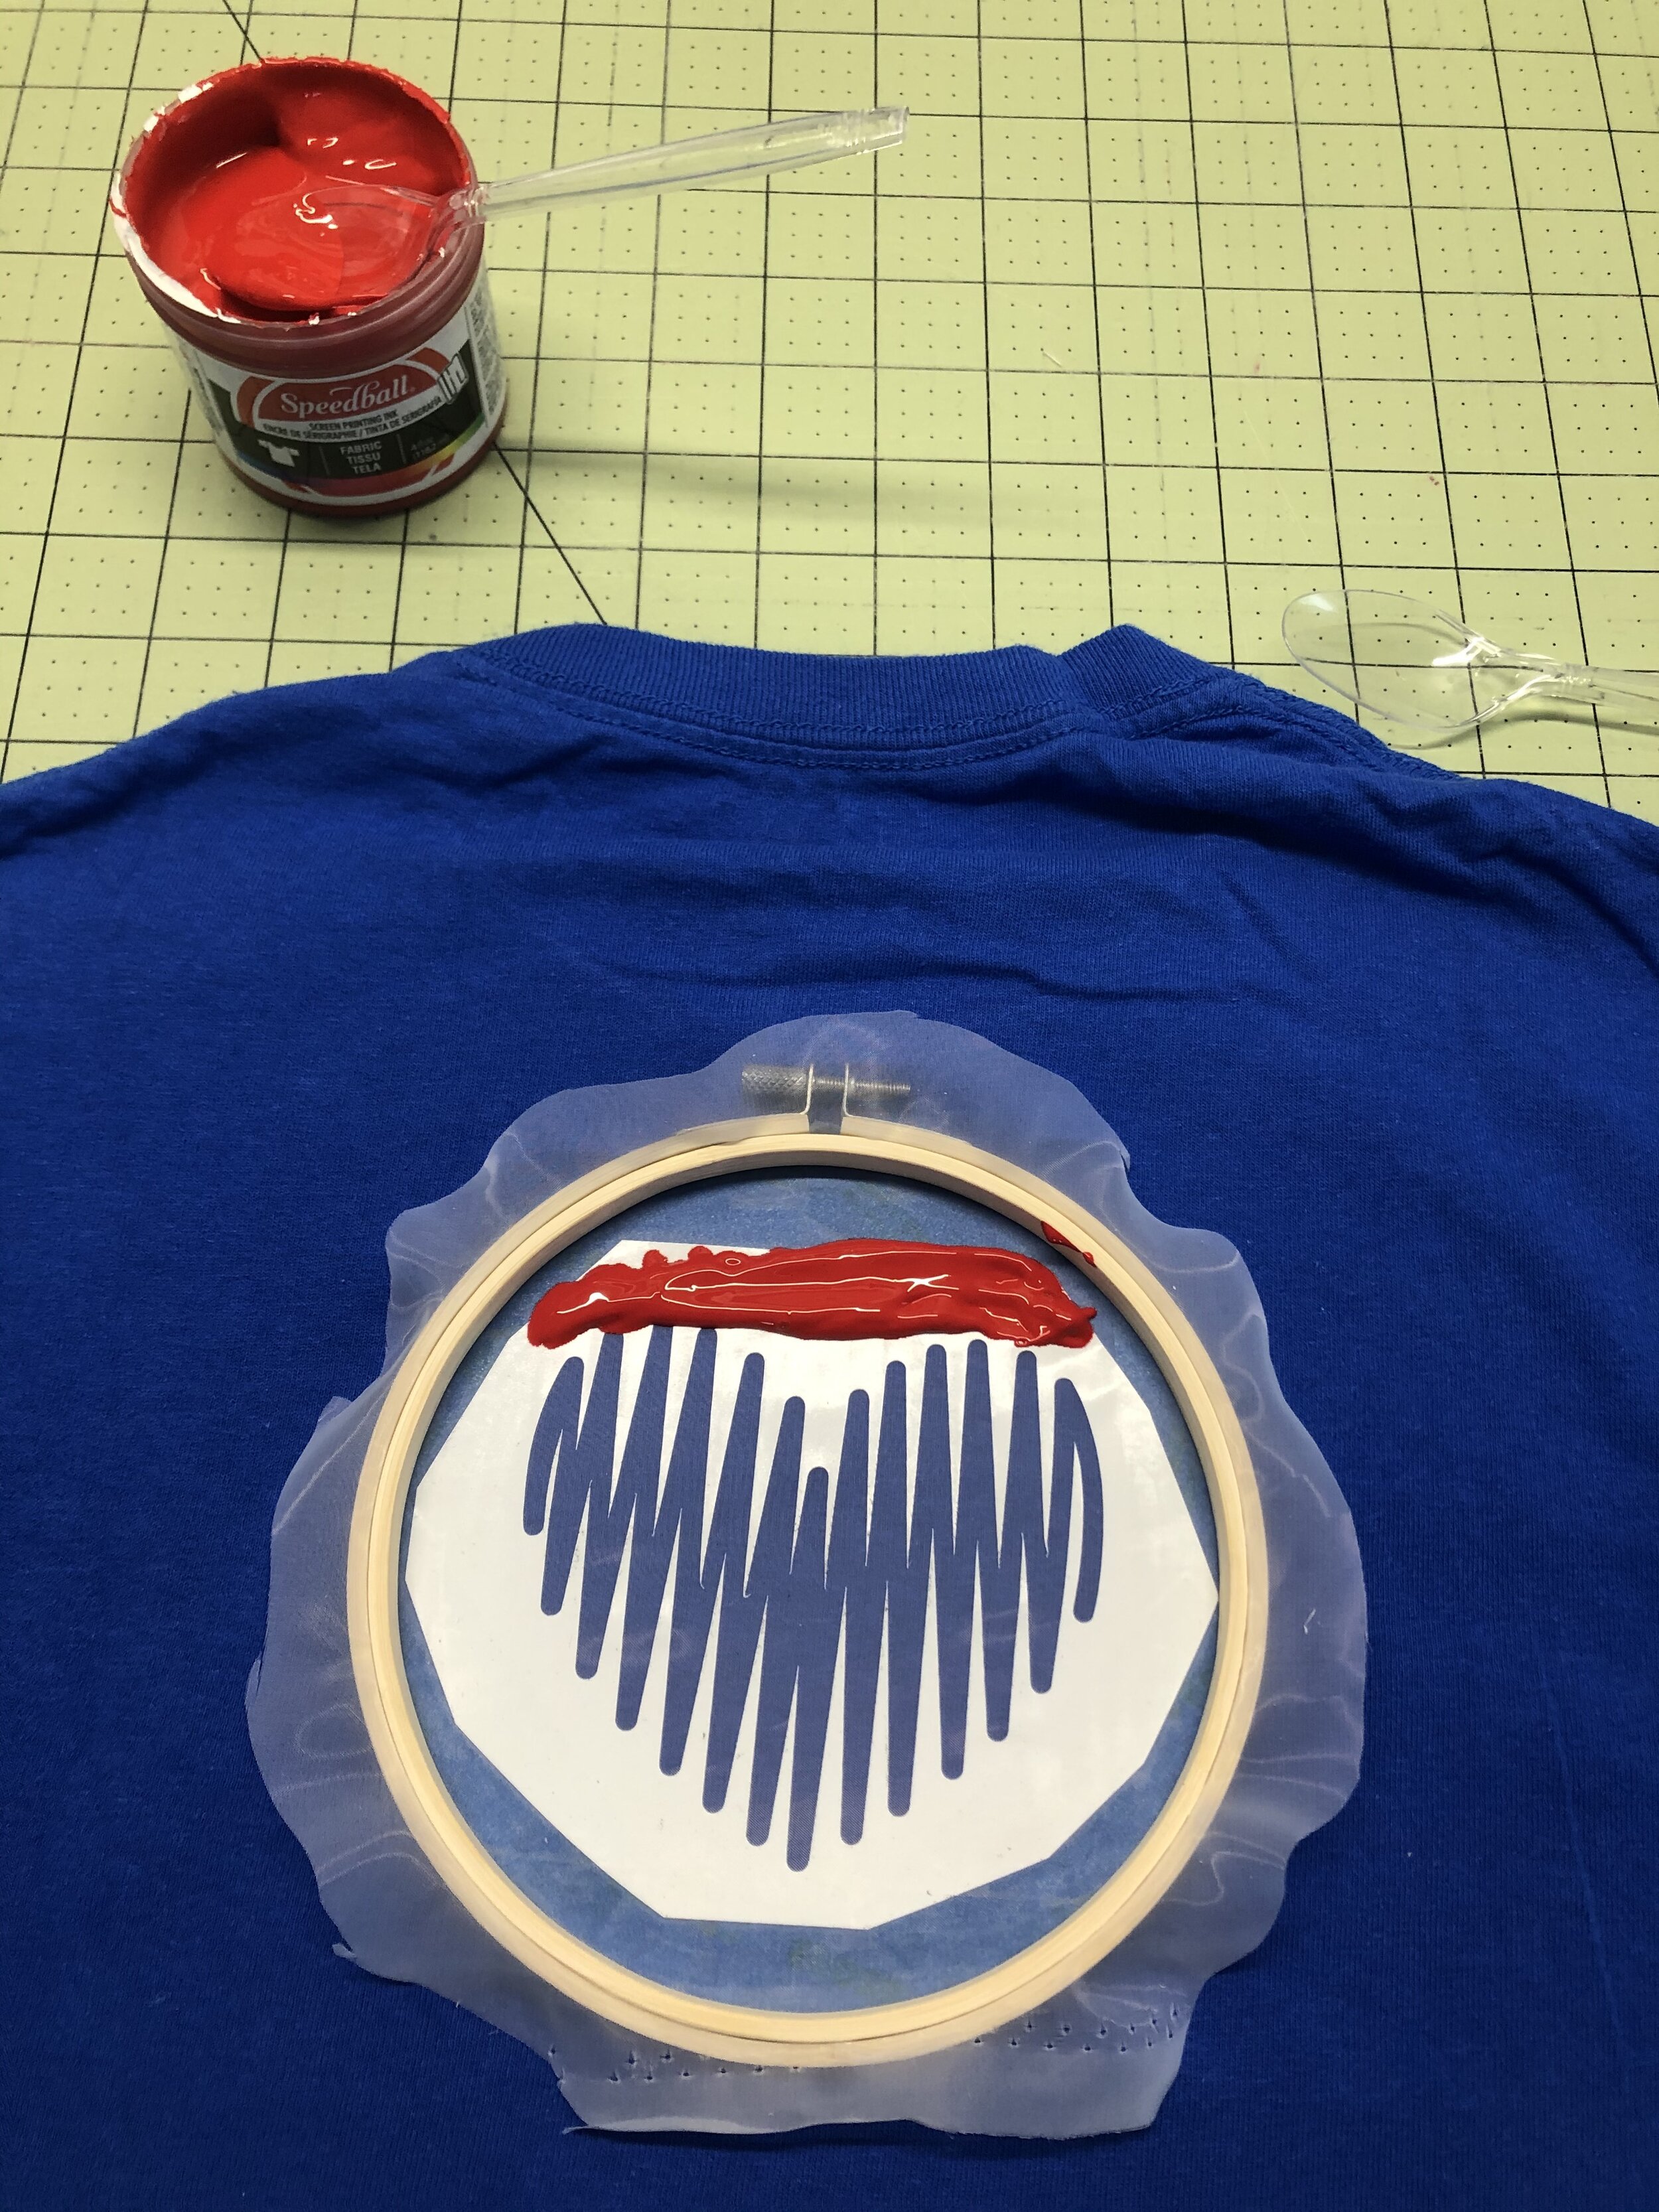
Finally came the fun part. I placed the screen on the shirt where I wanted it (top back) and spooned out some ink at the top of the design. You have to make sure that there is ink all the way across the top so that when you spread it down, it covers the whole design. Next I took the gift card/squeegee and dragged the ink from top to bottom while still applying pressure on the screen. I did a couple passes to make sure that there was plenty of ink applied to the shirt. Thankfully, the left over ink can be scooped up and put back in the container to be used again.
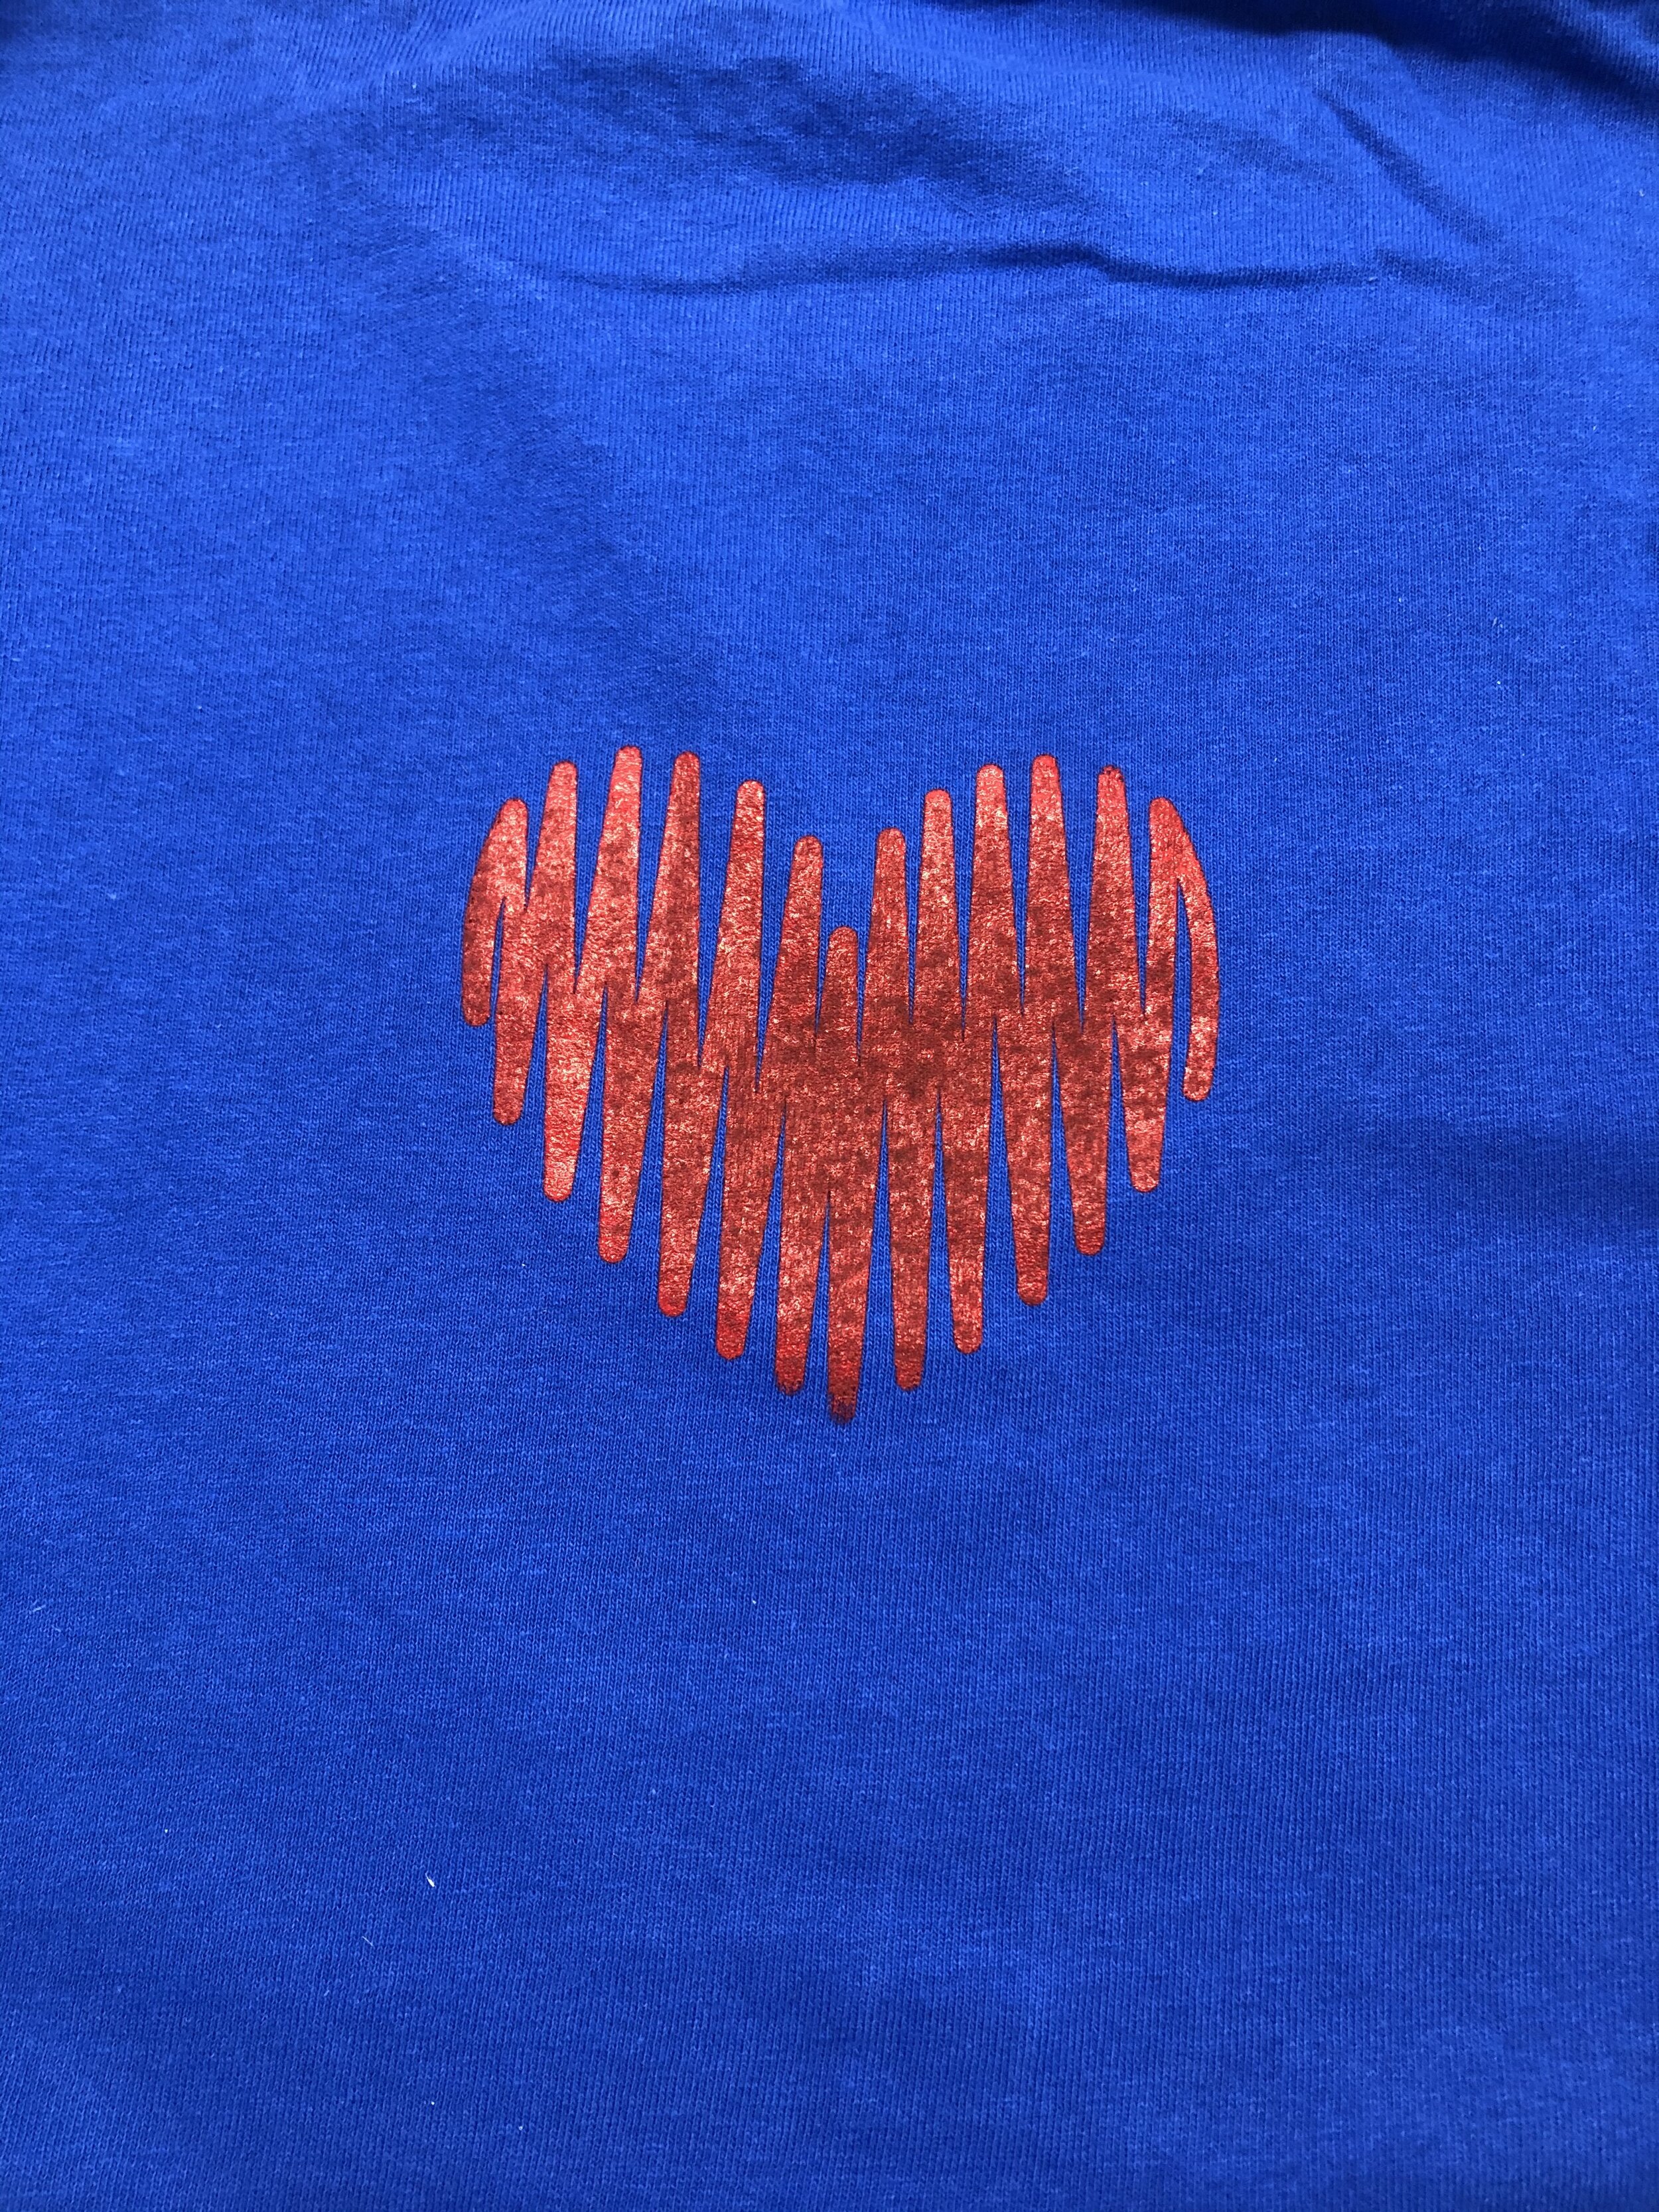
The next two were fun ones where I used the small containers to mix ink and do more tests to see how the screen would hold up. The ink washes off the screen when finished, but after heat setting the shirt, the color will stay put and is completely washable. A lot was learned and a lot is yet to be learned, but I’m looking forward to doing more experimenting. Stay tuned for more posts about this and my other methods of applying designs to apparel and other items!
Screen printing It is a super fun method of applying a single color design onto shirts and other pieces of apparel. My plan for this is to use it in a mass production type of order. If you are interested in having shirts made for a special occasion, please let me know and I will see how I can help you!
Here are some photos of the process…
My Sewing Machine History
Have you ever wondered how I make my magic happen in the sewing room? Well, here is a peek into how I got where I am today in my sewing, crafting, and now, embroidering business. Take a walk with me along memory lane as I share with you the story of each machine that I own.

Christmas morning 2006 I received my very own sewing machine. I remember the morning very clearly. After opening all of my gifts, my parents tricked me into thinking that they bought me a car and had me looking outside from the computer room window. While I was out of the room, a big box wrapped in fabric magically appeared. I was surprised, to say the least. My Huskvarna Viking 100 has been with me ever since. I can’t part ways with it as it still comes in handy if I need a separate machine to do a certain step in the process of mass producing an item. This little work horse has made many quilts, quilted a twin sized quilt, and got me started with CWeedaCreations.

The next addition to my sewing machine family came in the summer of 2012 after I graduated from the University of Nebraska-Lincoln. I had worked at Sew Creative during my time at UNL and became close friends with the owner Paul. This Babylock Eclipse serger was my graduation/parting gift and I couldn’t have been happier. A serger comes in handy in so many different ways; it’s almost a permanent fixture on my crafting table. This machine has sewn on many quilt bindings, made many Rosary cases, and various other projects that need its special stitch.
A couple years after starting CWC, I saved up enough money to purchase my first embroidery machine! My Babylock Ellageo came along in 2014 and had been my main machine for 5 years. It opened up so many possibilities and got my feet wet in the embroidery world. It has made well over 150 can koozies, countless hot pads, and other random craft items. At this same time, I purchased a laptop and embroidery software to be able to make my own designs, digitize logos, and stitch them out.
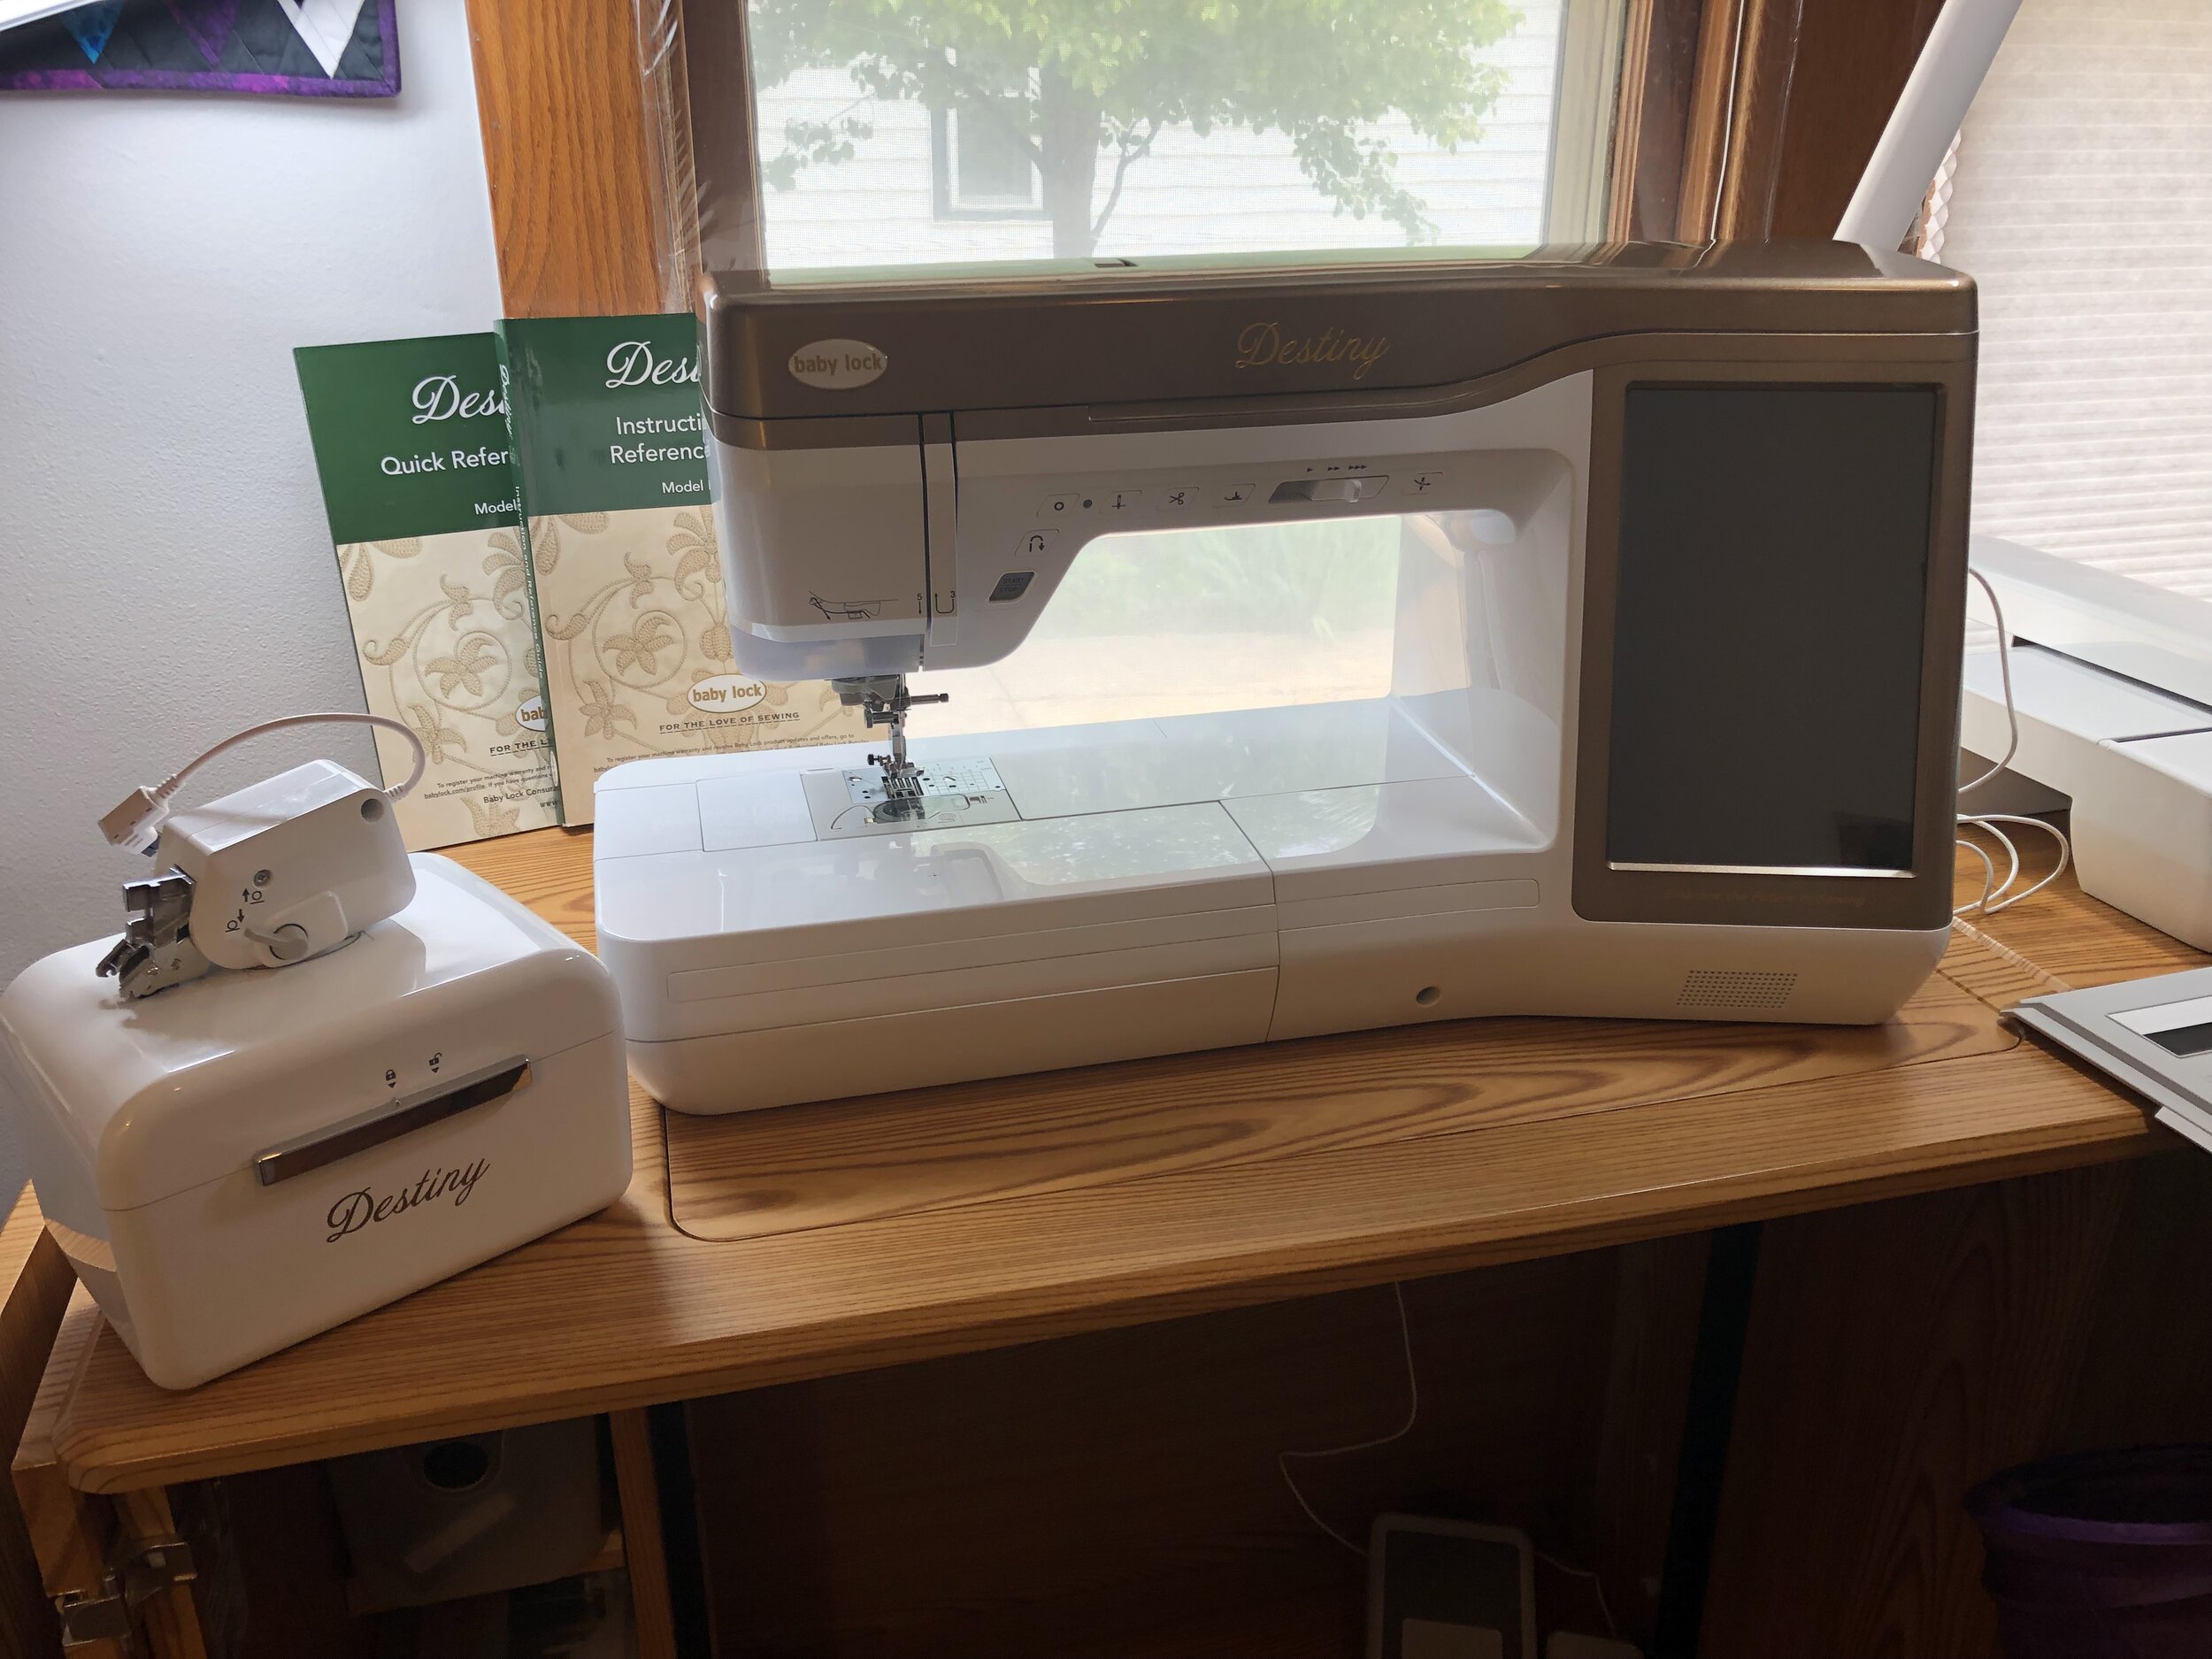
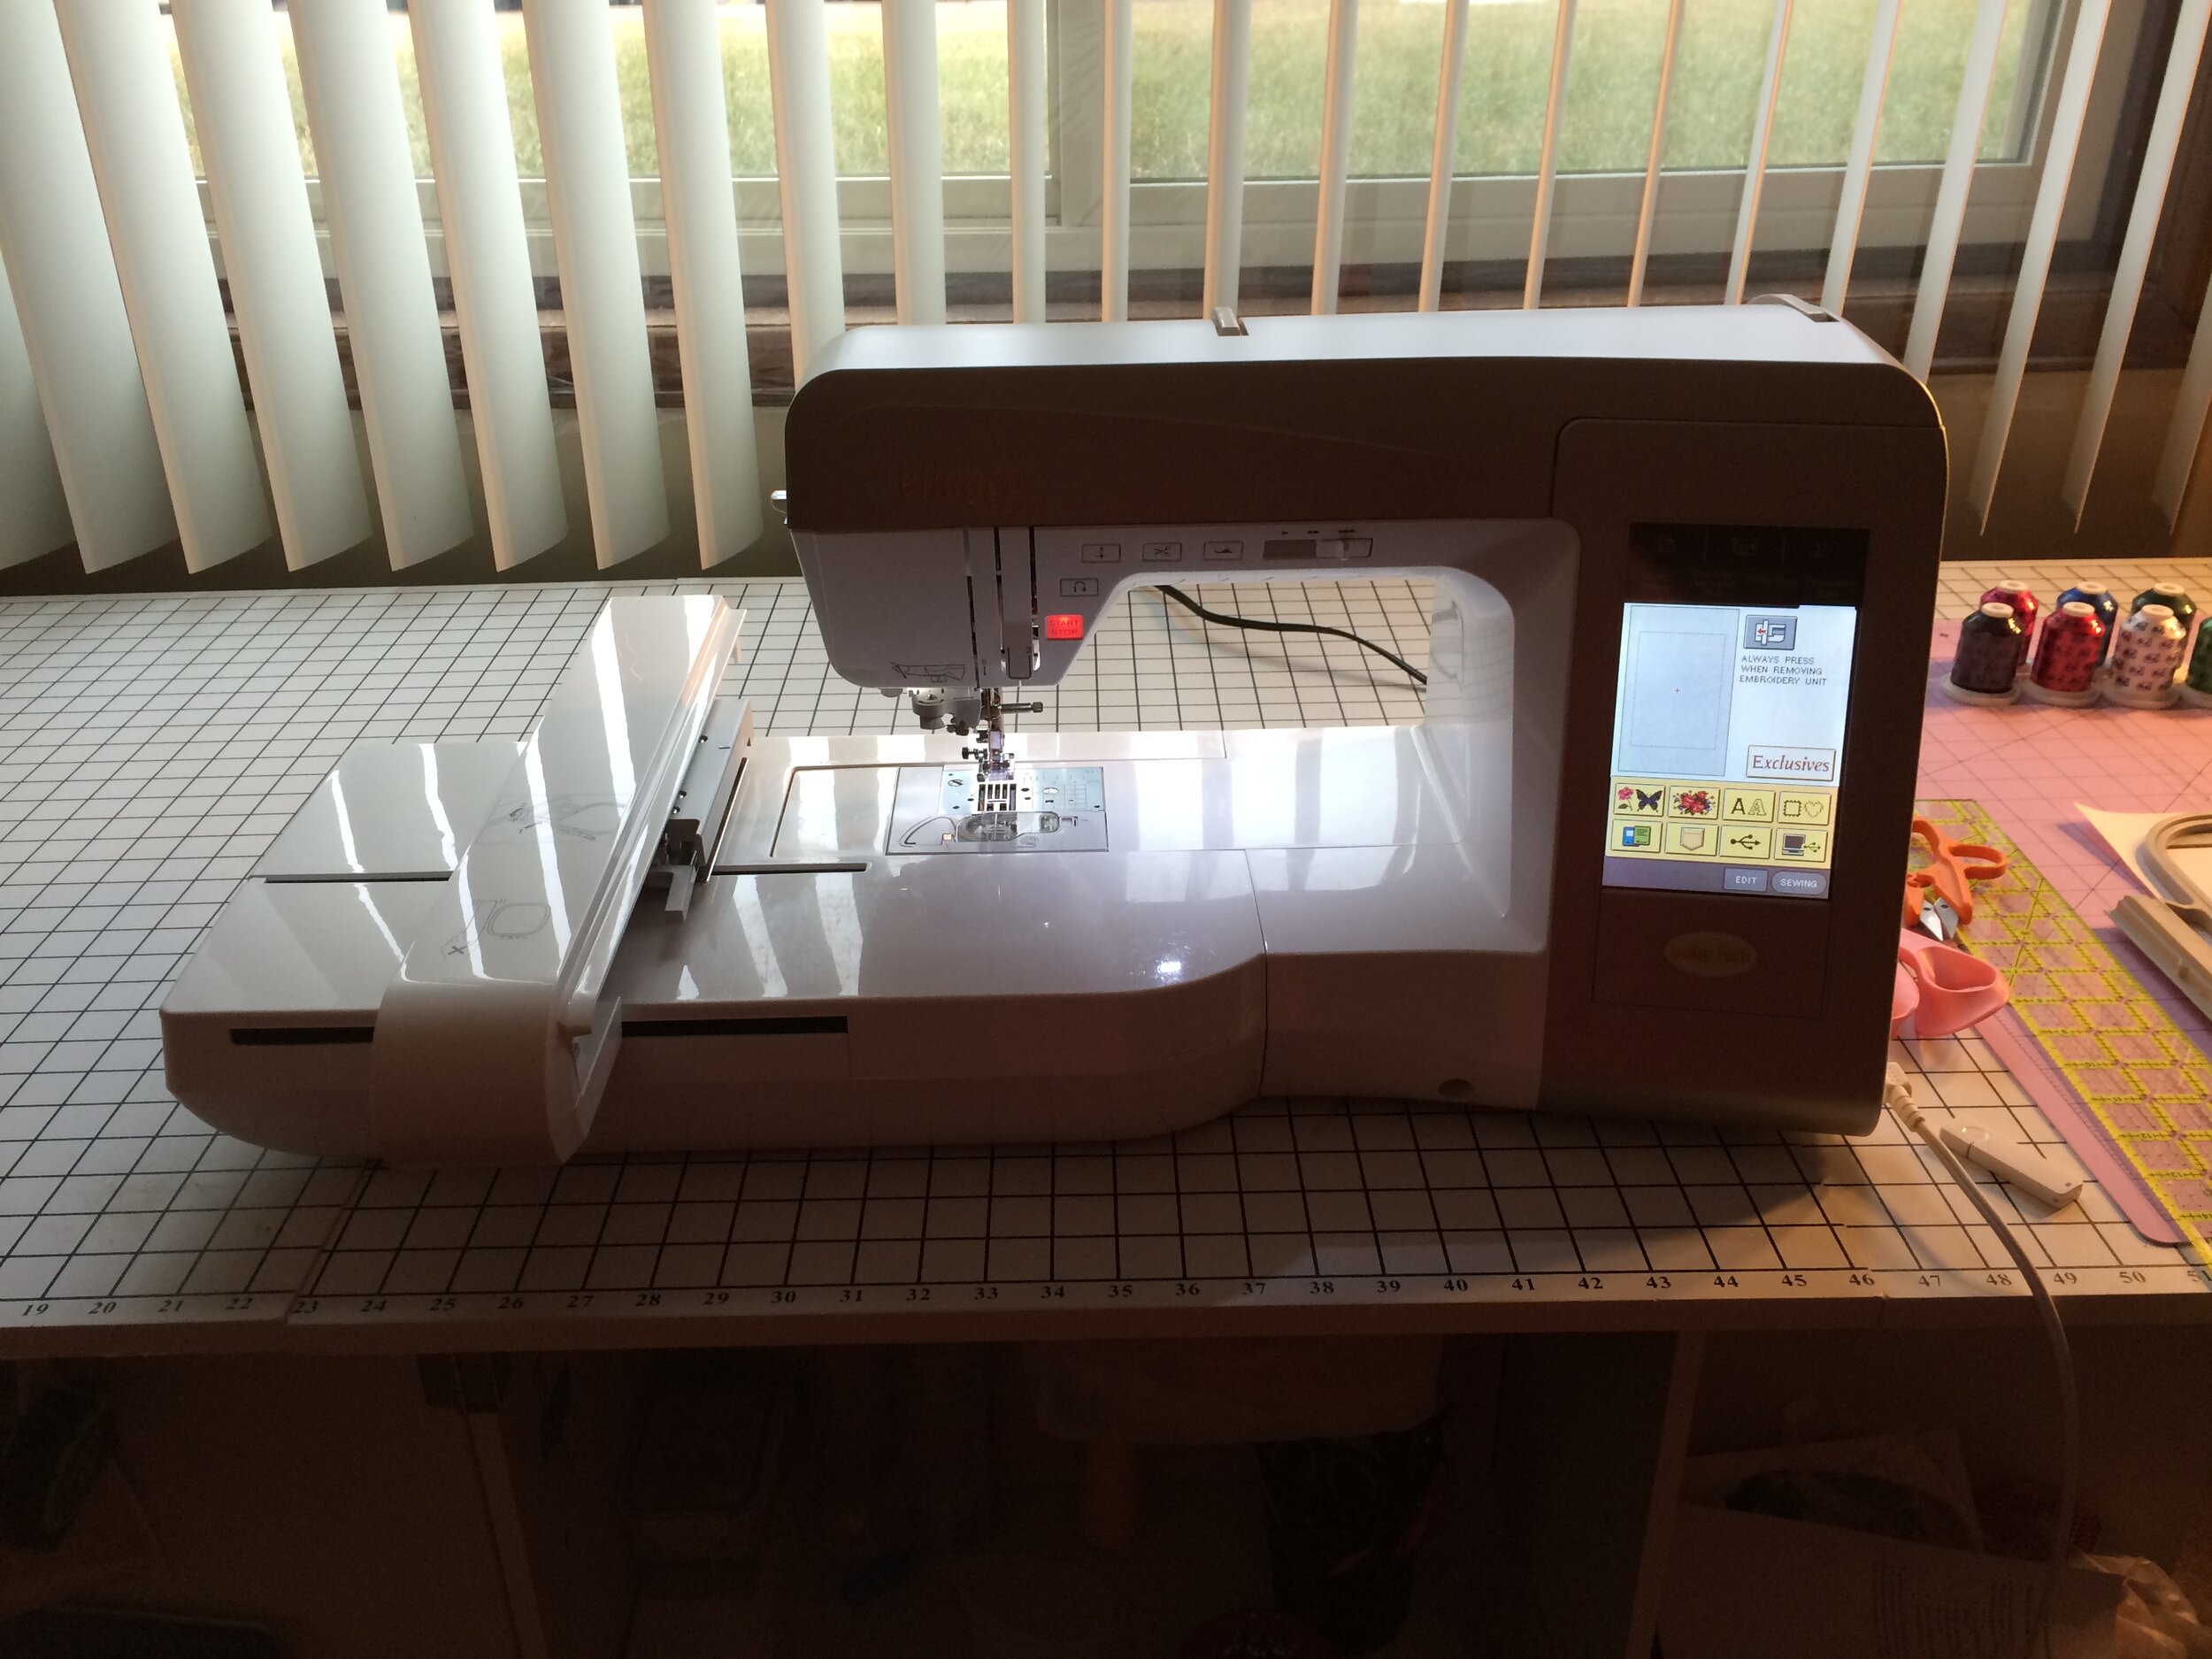
In May of 2019, another new machine made an appearance! Paul at Sew Creative had been keeping an eye open for a machine upgrade for me and this one came along at just the right time. My Babylock Destiny is an amazing sewing and embroidery machine. It has an LED screen the size of an iPad, laser stitch guide, scan and digitize capabilities, and a drawer full of embroidery hoops to stitch almost any size of design. Oh, and a box full of fun feet that do many different things! This is now my go-to machine; as you can see it is on my Koala sewing cabinet, ready to work!

Only 15 months later, Paul called again to say that he had a lead on a used Babylock BMP8 6-needle embroidery machine. I couldn’t say no. This has been my dream since I first stepped foot in Sew Creative and saw the business capabilities of a machine like this. Not only can it embroider apparel and other crafts, but it can do CAPS! In just a couple short months, I have embroidered custom masks for my school and am working with a local band, The Wildwoods, embroidering their logo on caps and sweaters. This is a game changer and I can’t wait to see where it takes me!
Well, there you have it…the history of CWeedaCreations’s sewing machines. I hope you enjoyed reading about all of my toys and where they have lead me today. I wonder what my next purchase will be? Only time will tell.